
Fixing a dead Fireface 800

I have been a big fan of RME hardware since I worked at a small Nuendo audio house in Toronto. The hardware is rugged, multifaceted in it’s approach to interface design and a Swiss Army of audio interconnection. They have even better interfaces these days, but what if you find yourself with a dead Fireface or you see one available? Well today we are going to resurrect it with a new power supply purchased from RME-shop, a parts supplier for RME. As always be very careful working with a PSU as the capacitors can be charged.
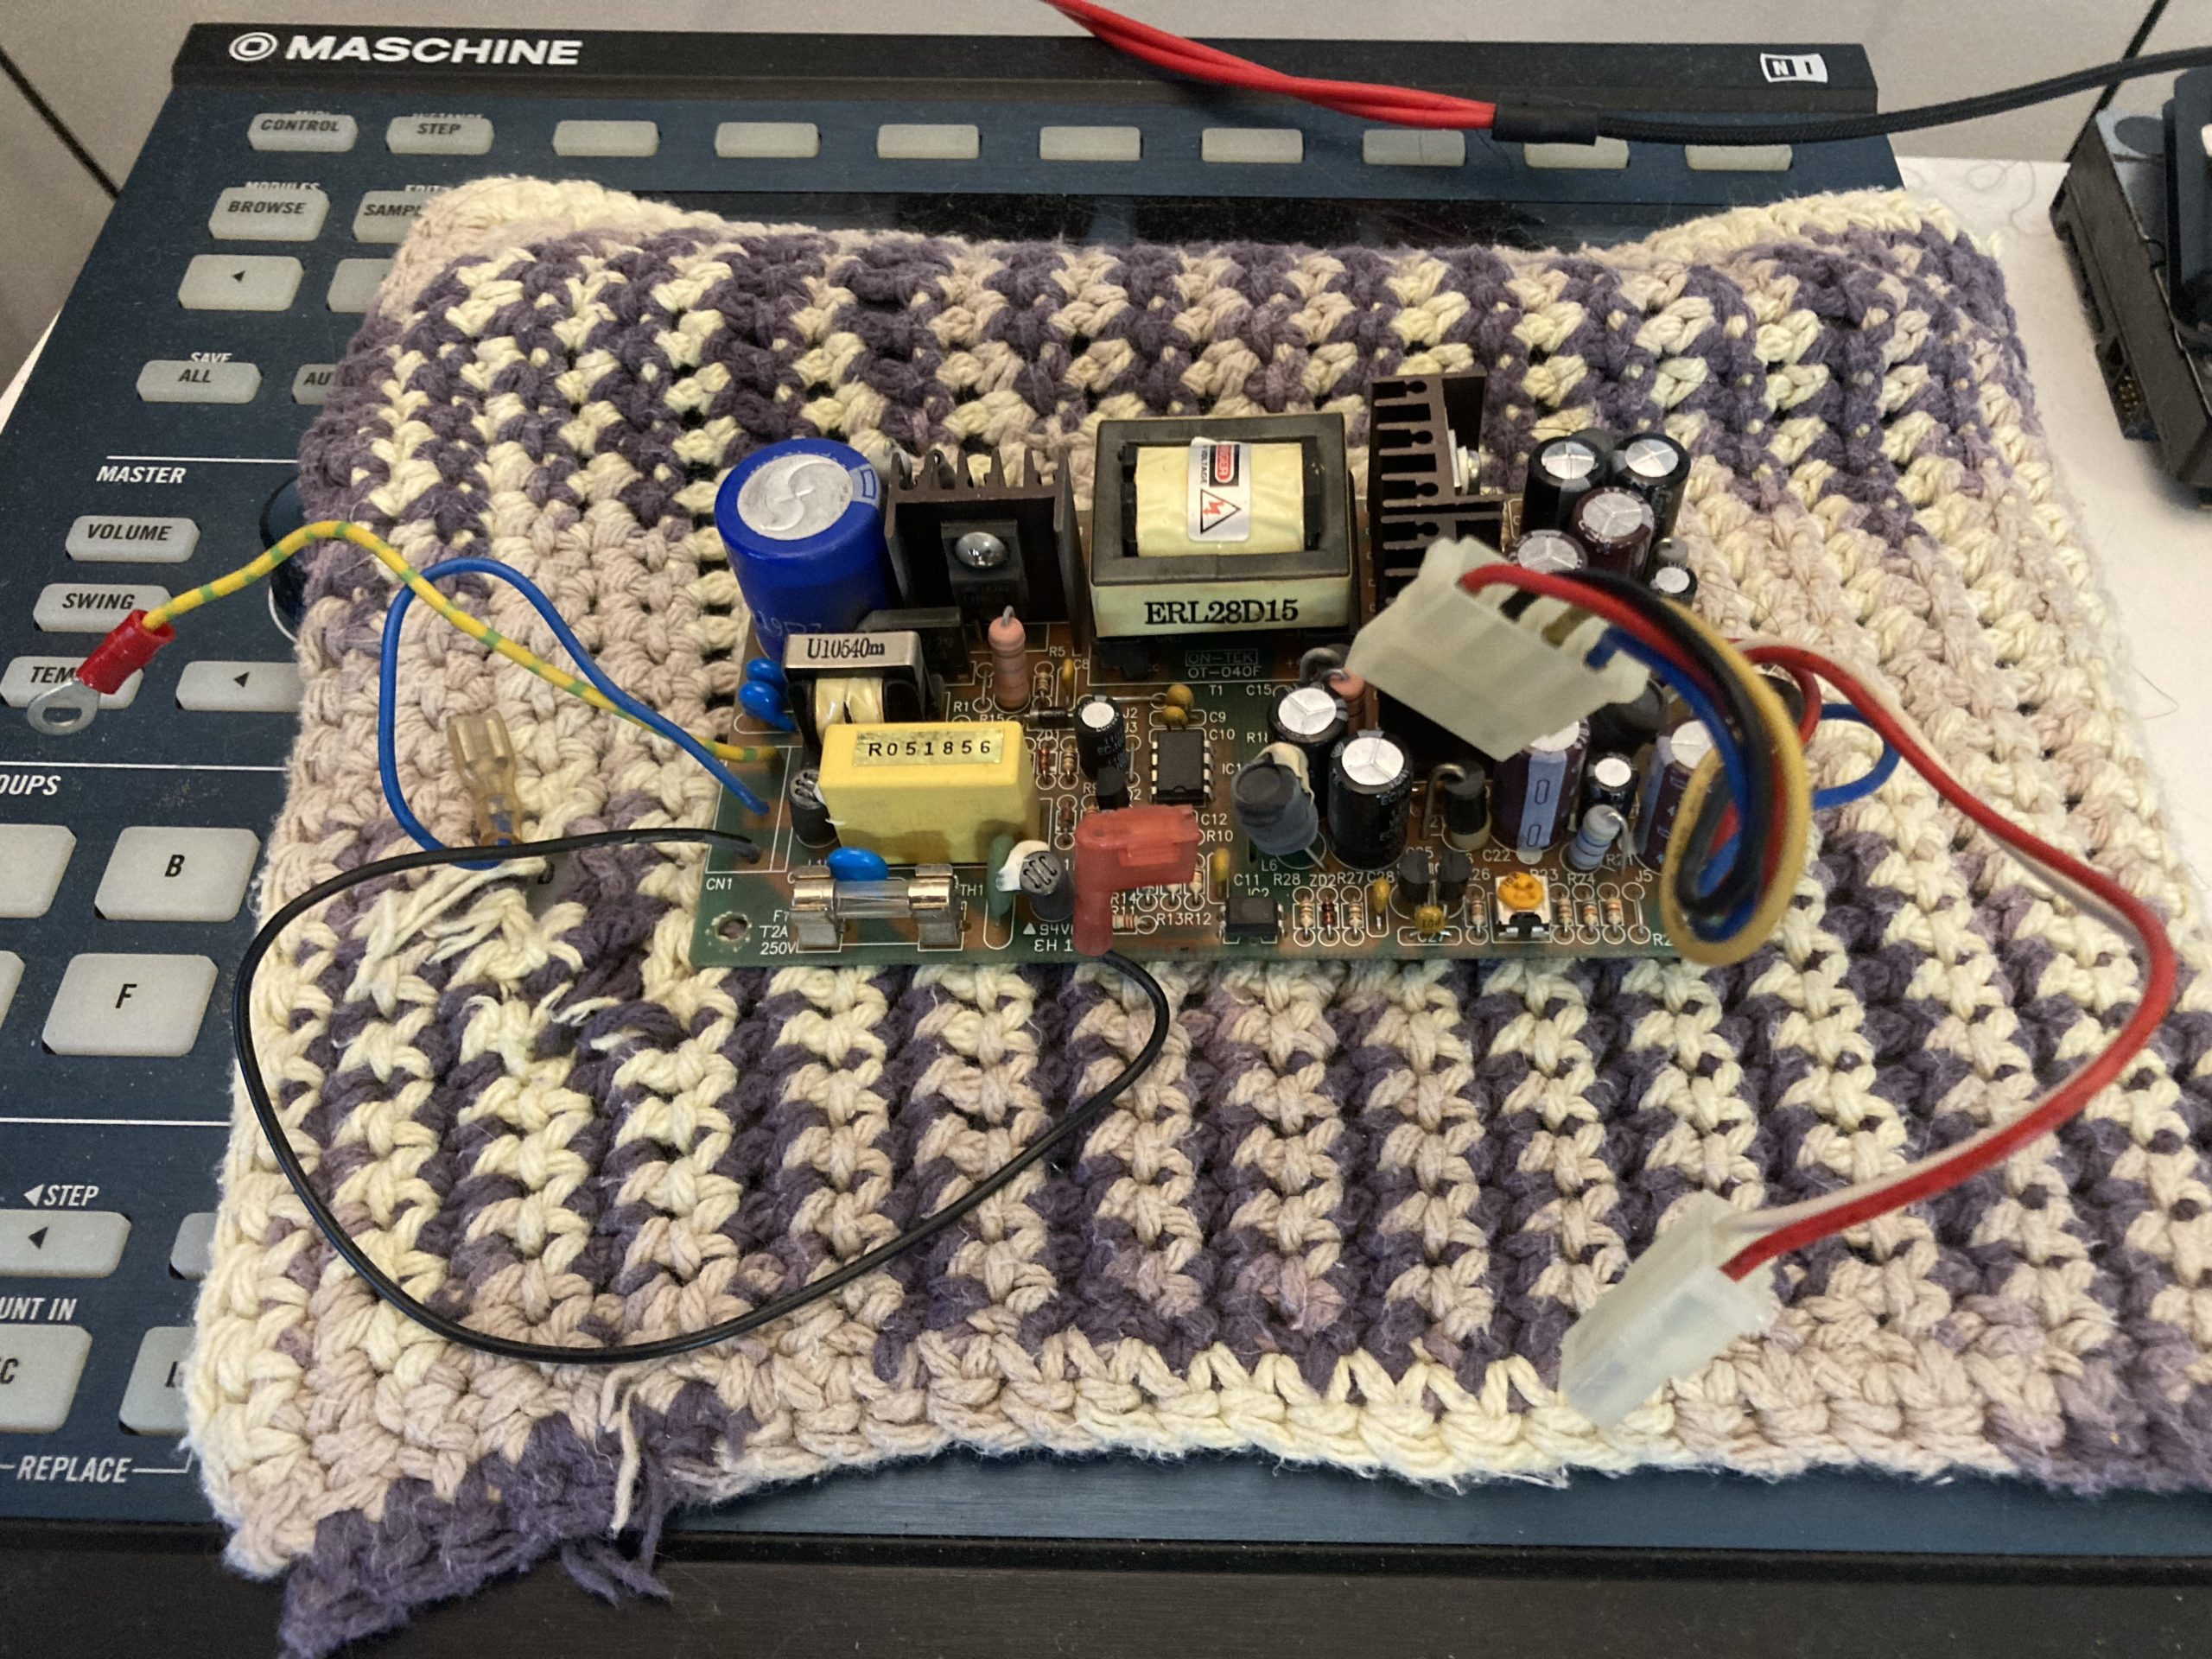
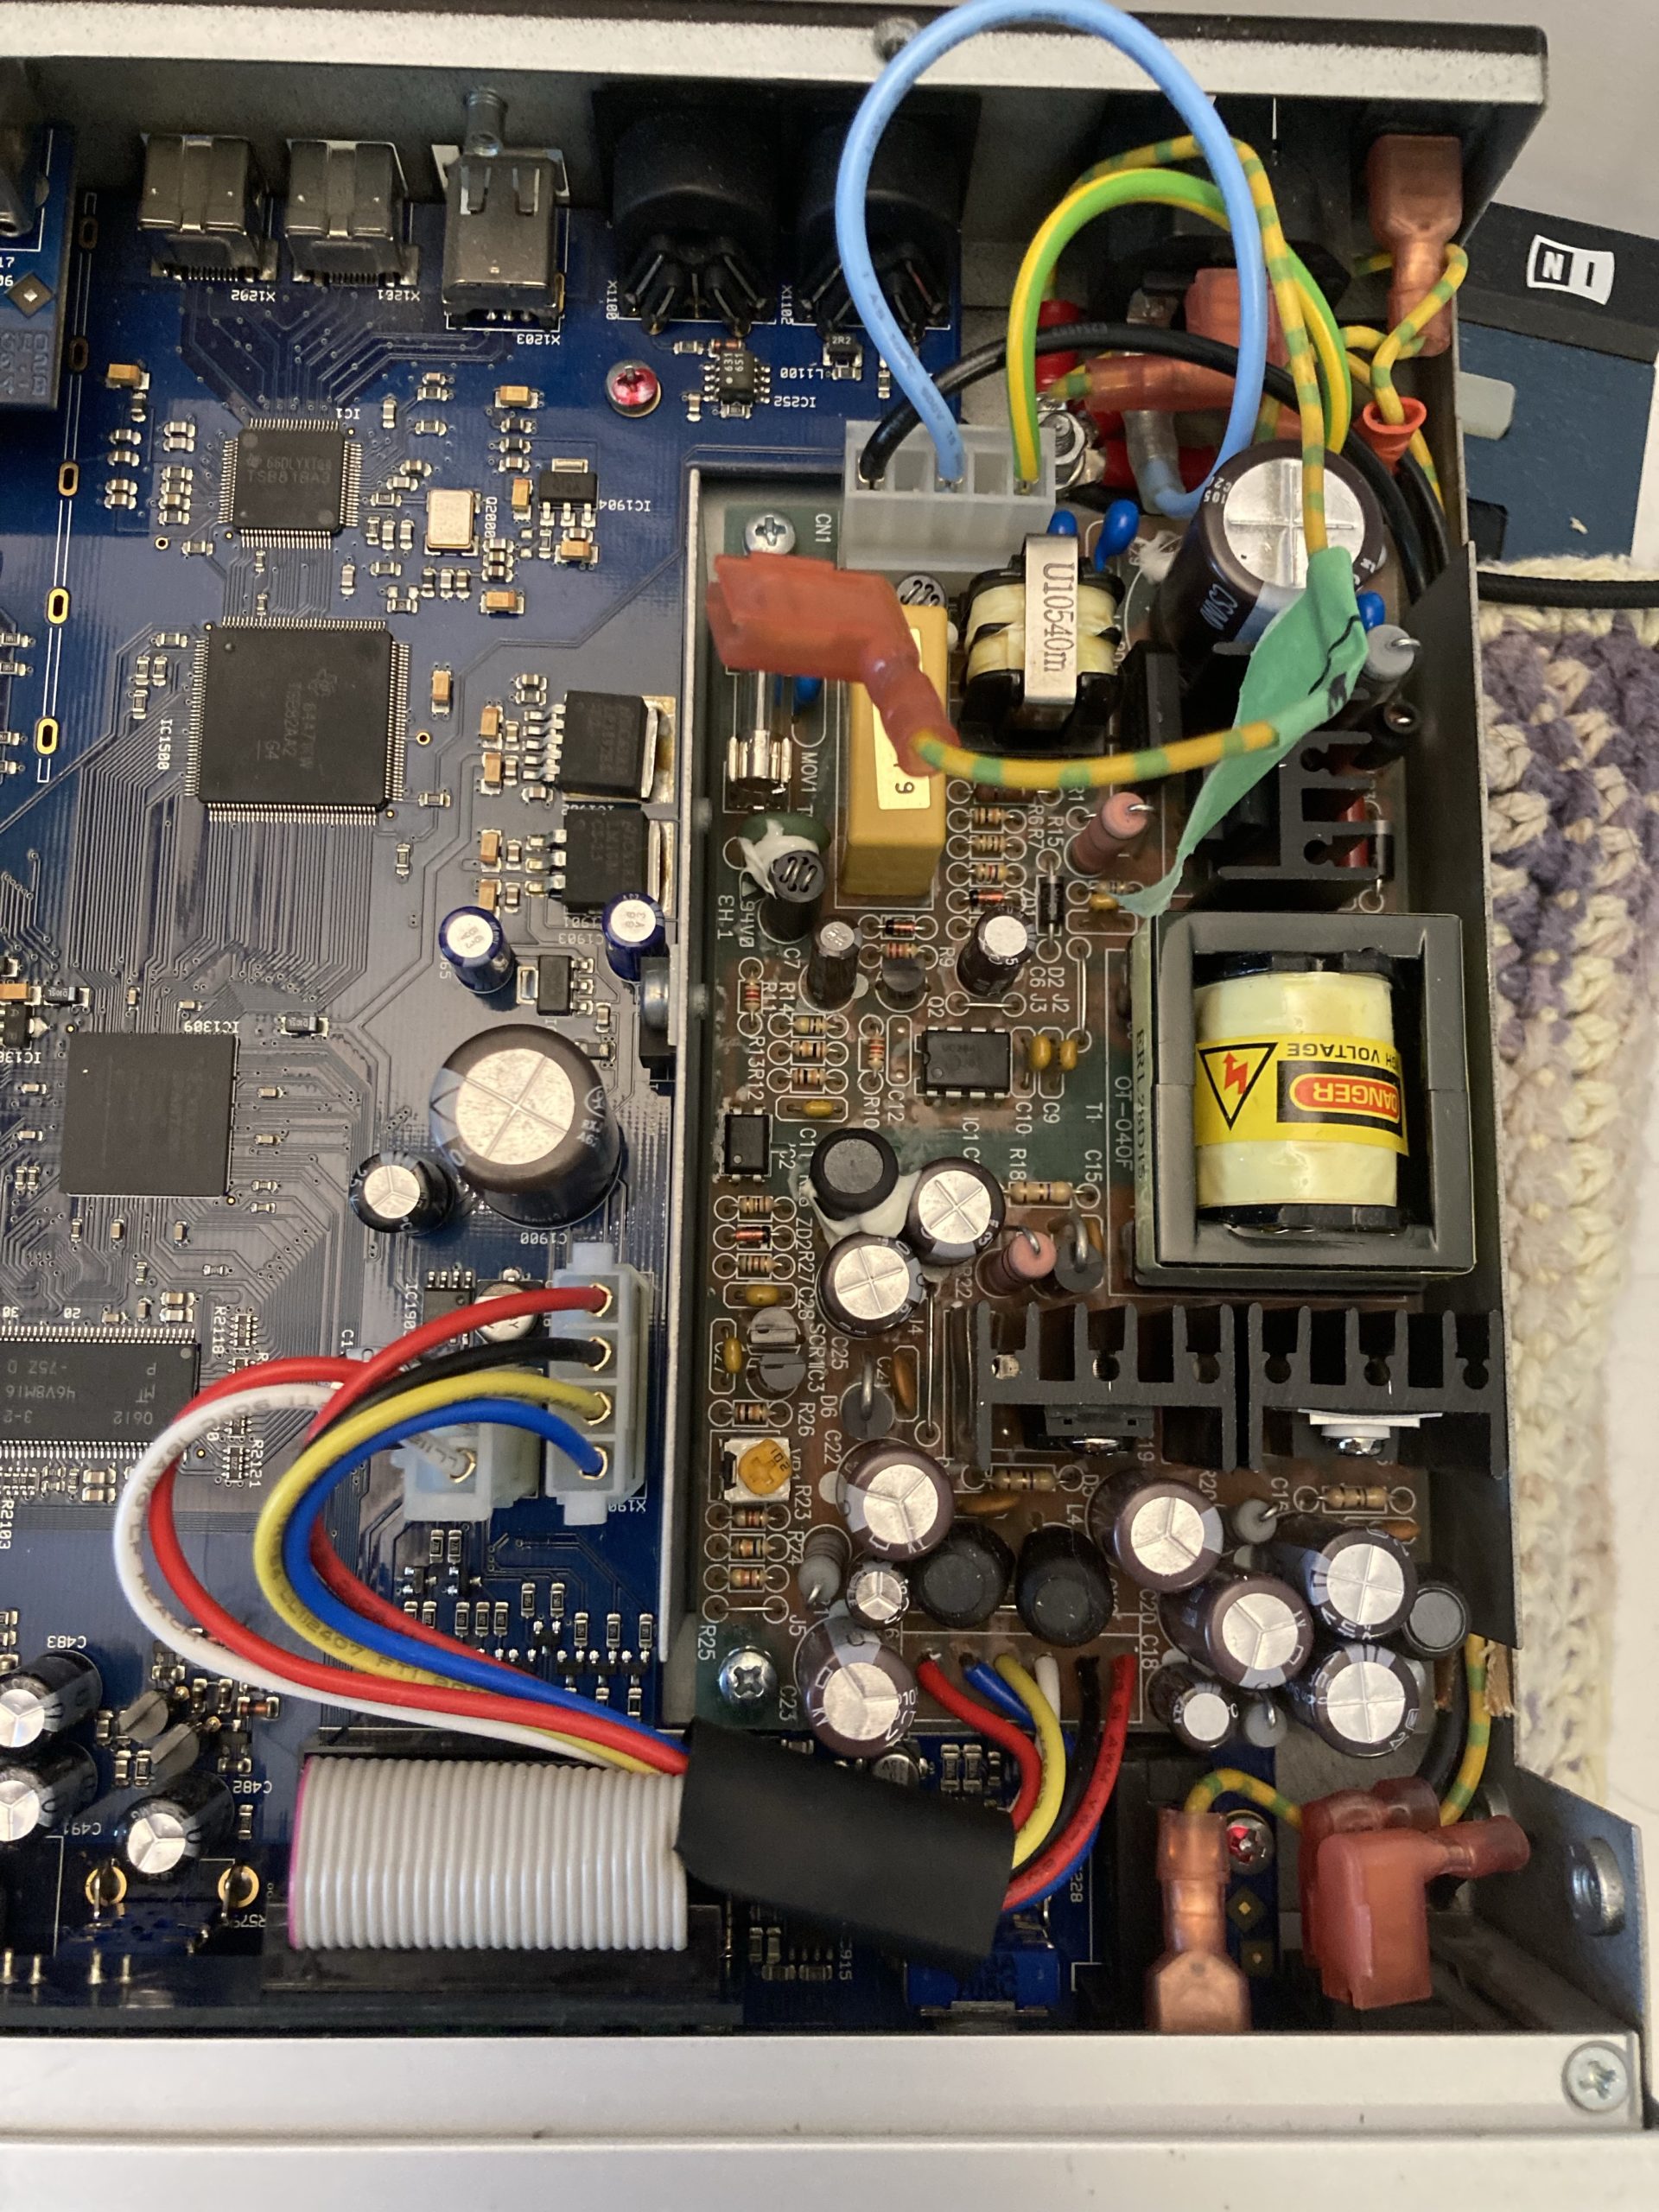
Before we start. The power supply unit I pulled out is likely still functional, save for those bulging capacitors. Recapping a PSU is pretty easy and could save you money and time if you can find the components. Today I just opted to swap the PSU out. Unlplug the unit and leave it turned on for a while. The capacitors can hold a charge that can kill so stay away from them or discharge them. Some capacitors can hold a charge for months. For a complete list of capacitors you can see the last post on this Gearspace page. You can upload the XLS file posted there to DigiKey and easily get all the right parts without fear of getting the wrong component.
First things first.
First, read the entire guide, then get a small Phillips head screwdriver and spudger, or a pen to help manipulate things, and a 7mm wrench for the grounding nut. Open the Fireface 800 rev1 by removing 7 small black screws on the body and the rack ears (3 each).
Slide the cover off towards the back but be aware a ground connector is attached to the top. It is not really fragile but don’t forget about it and yank the cover off. Wiggle it back and forth gently until it let’s go at the cover side.
Remove the four screws holding the old power supply in place and pull it out to give yourself more working room if your model is like mine. Otherwise skip this till later and unplug all the connectors first. There is a small trick to it, so read the entire guide first.
I have an older serial so the PSU in my case was hard soldered in. It’s pretty hard to work around the cables like this so I removed the PSU first. You can re-solder this back in if you want to just fix the old PSU.
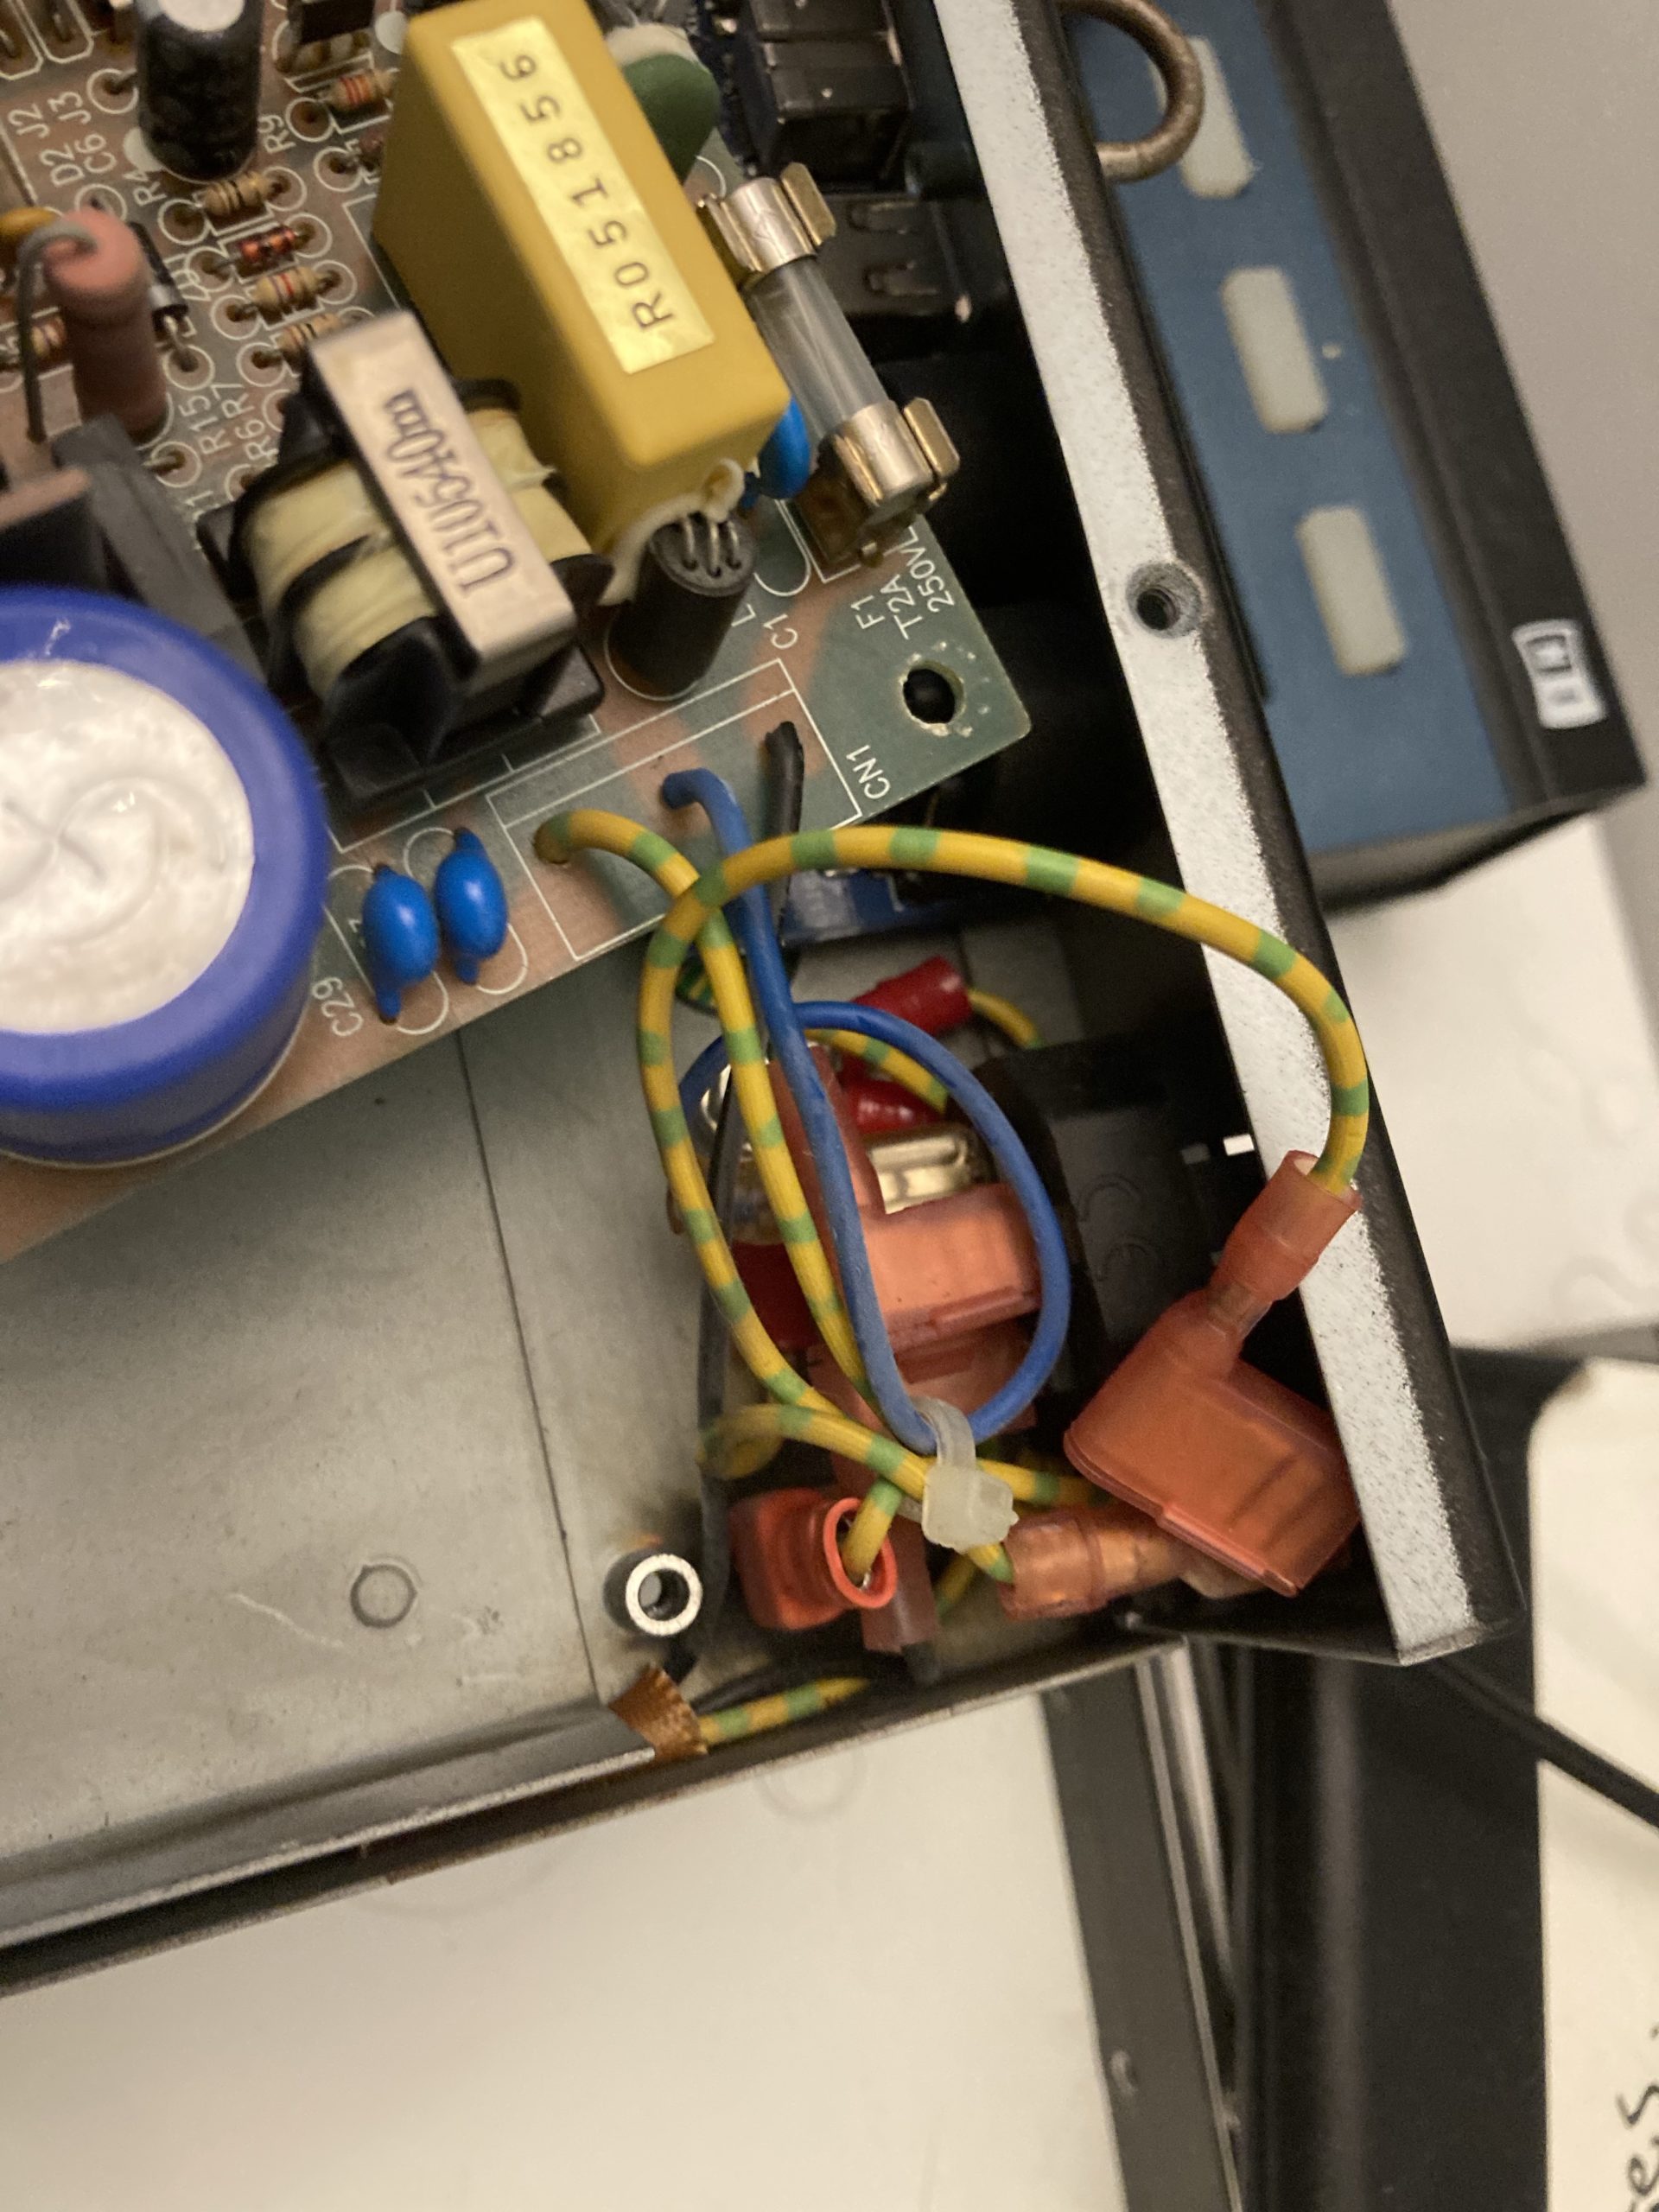
The first cable is connected to a ground that will need to removed with a wrench. The second goes straight to the AC terminal. The third cable can be traced back to the power switch (bottom of frame). I would disconnect anything in your way and immediately plug in whatever you didn’t need to disconnect so you don’t forget where things were wired. Also, you are working with AC mains here so things can go very badly if you aren’t taking your time and tracking your steps carefully. Take photos of anything before you disassemble and leave yourself notes, especially if you are not completing the job in a single sitting.
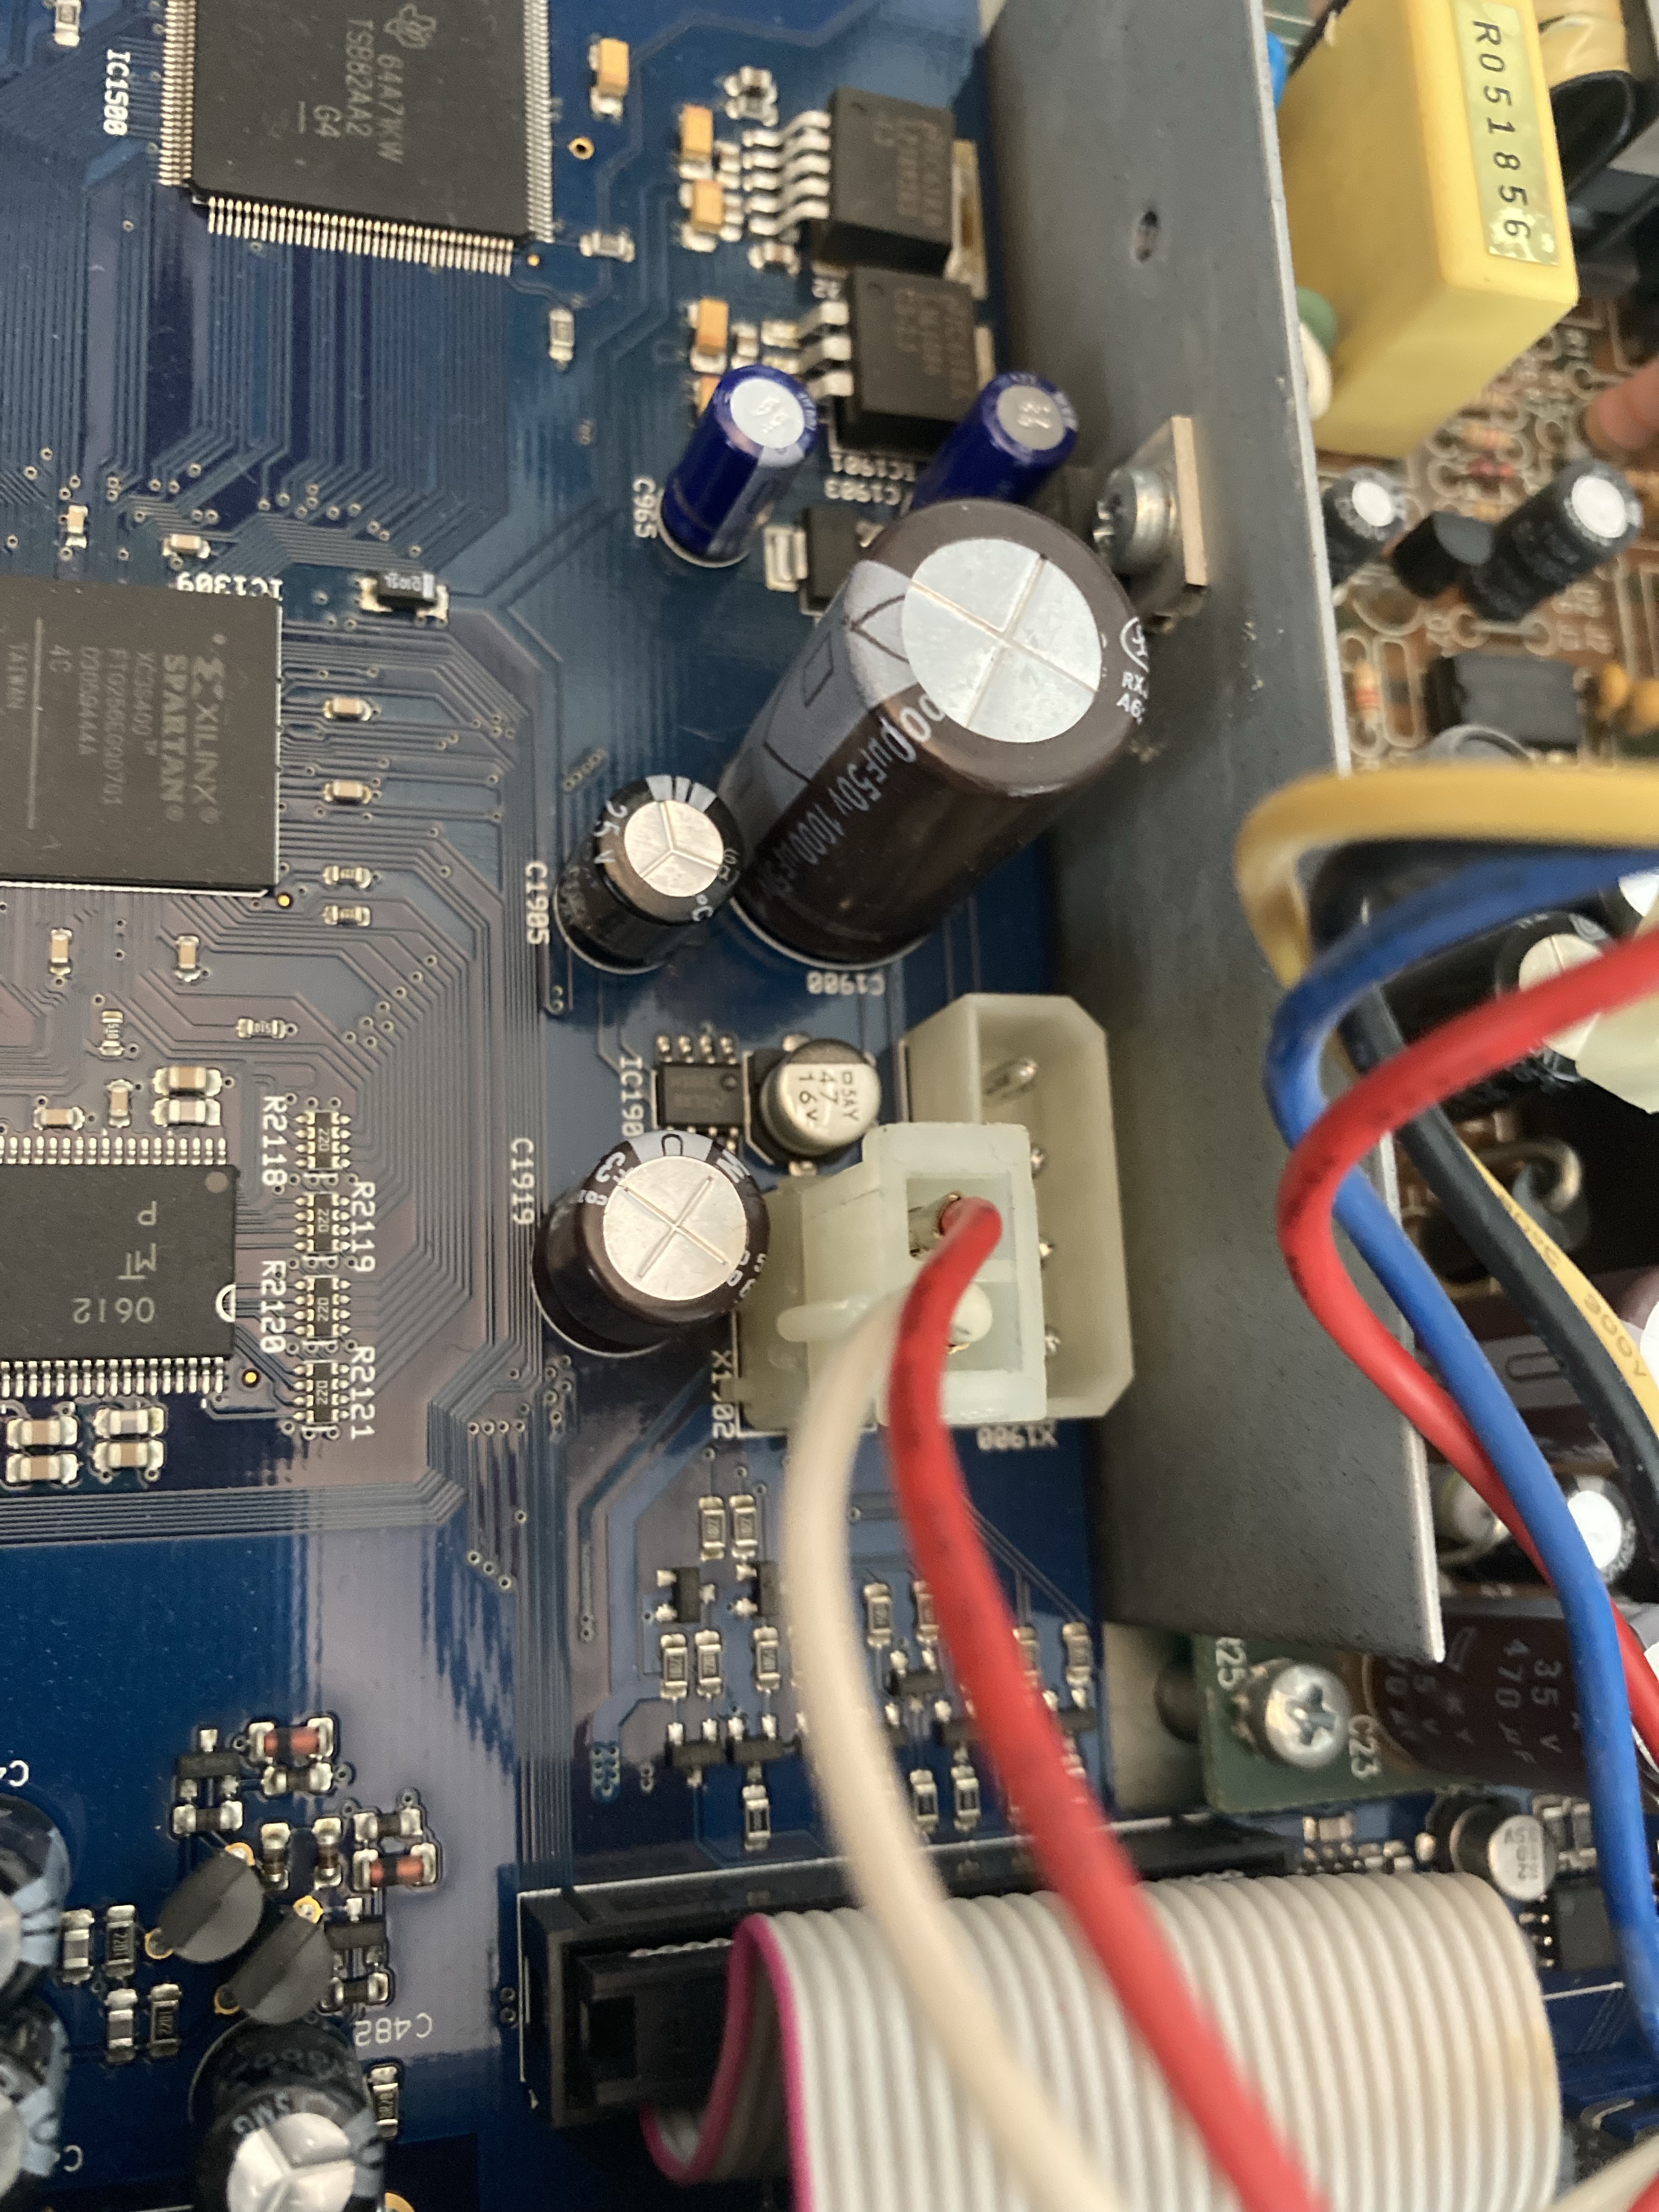
Remove the terminals and the molex cables that are connecting the PSU to the board if you haven’t already. They can come out with gentle wiggling along the width of the connector (not the flimsy way).
The one connector that really got me was the two pin molex.
The solution is to use 99% alcohol. I had tried to remove this cable for the better part of a day and asked on several forums for tips. Owen Osborne helped me out and tipped me off to splashing the connector with alcohol before working it free. It works like magic.
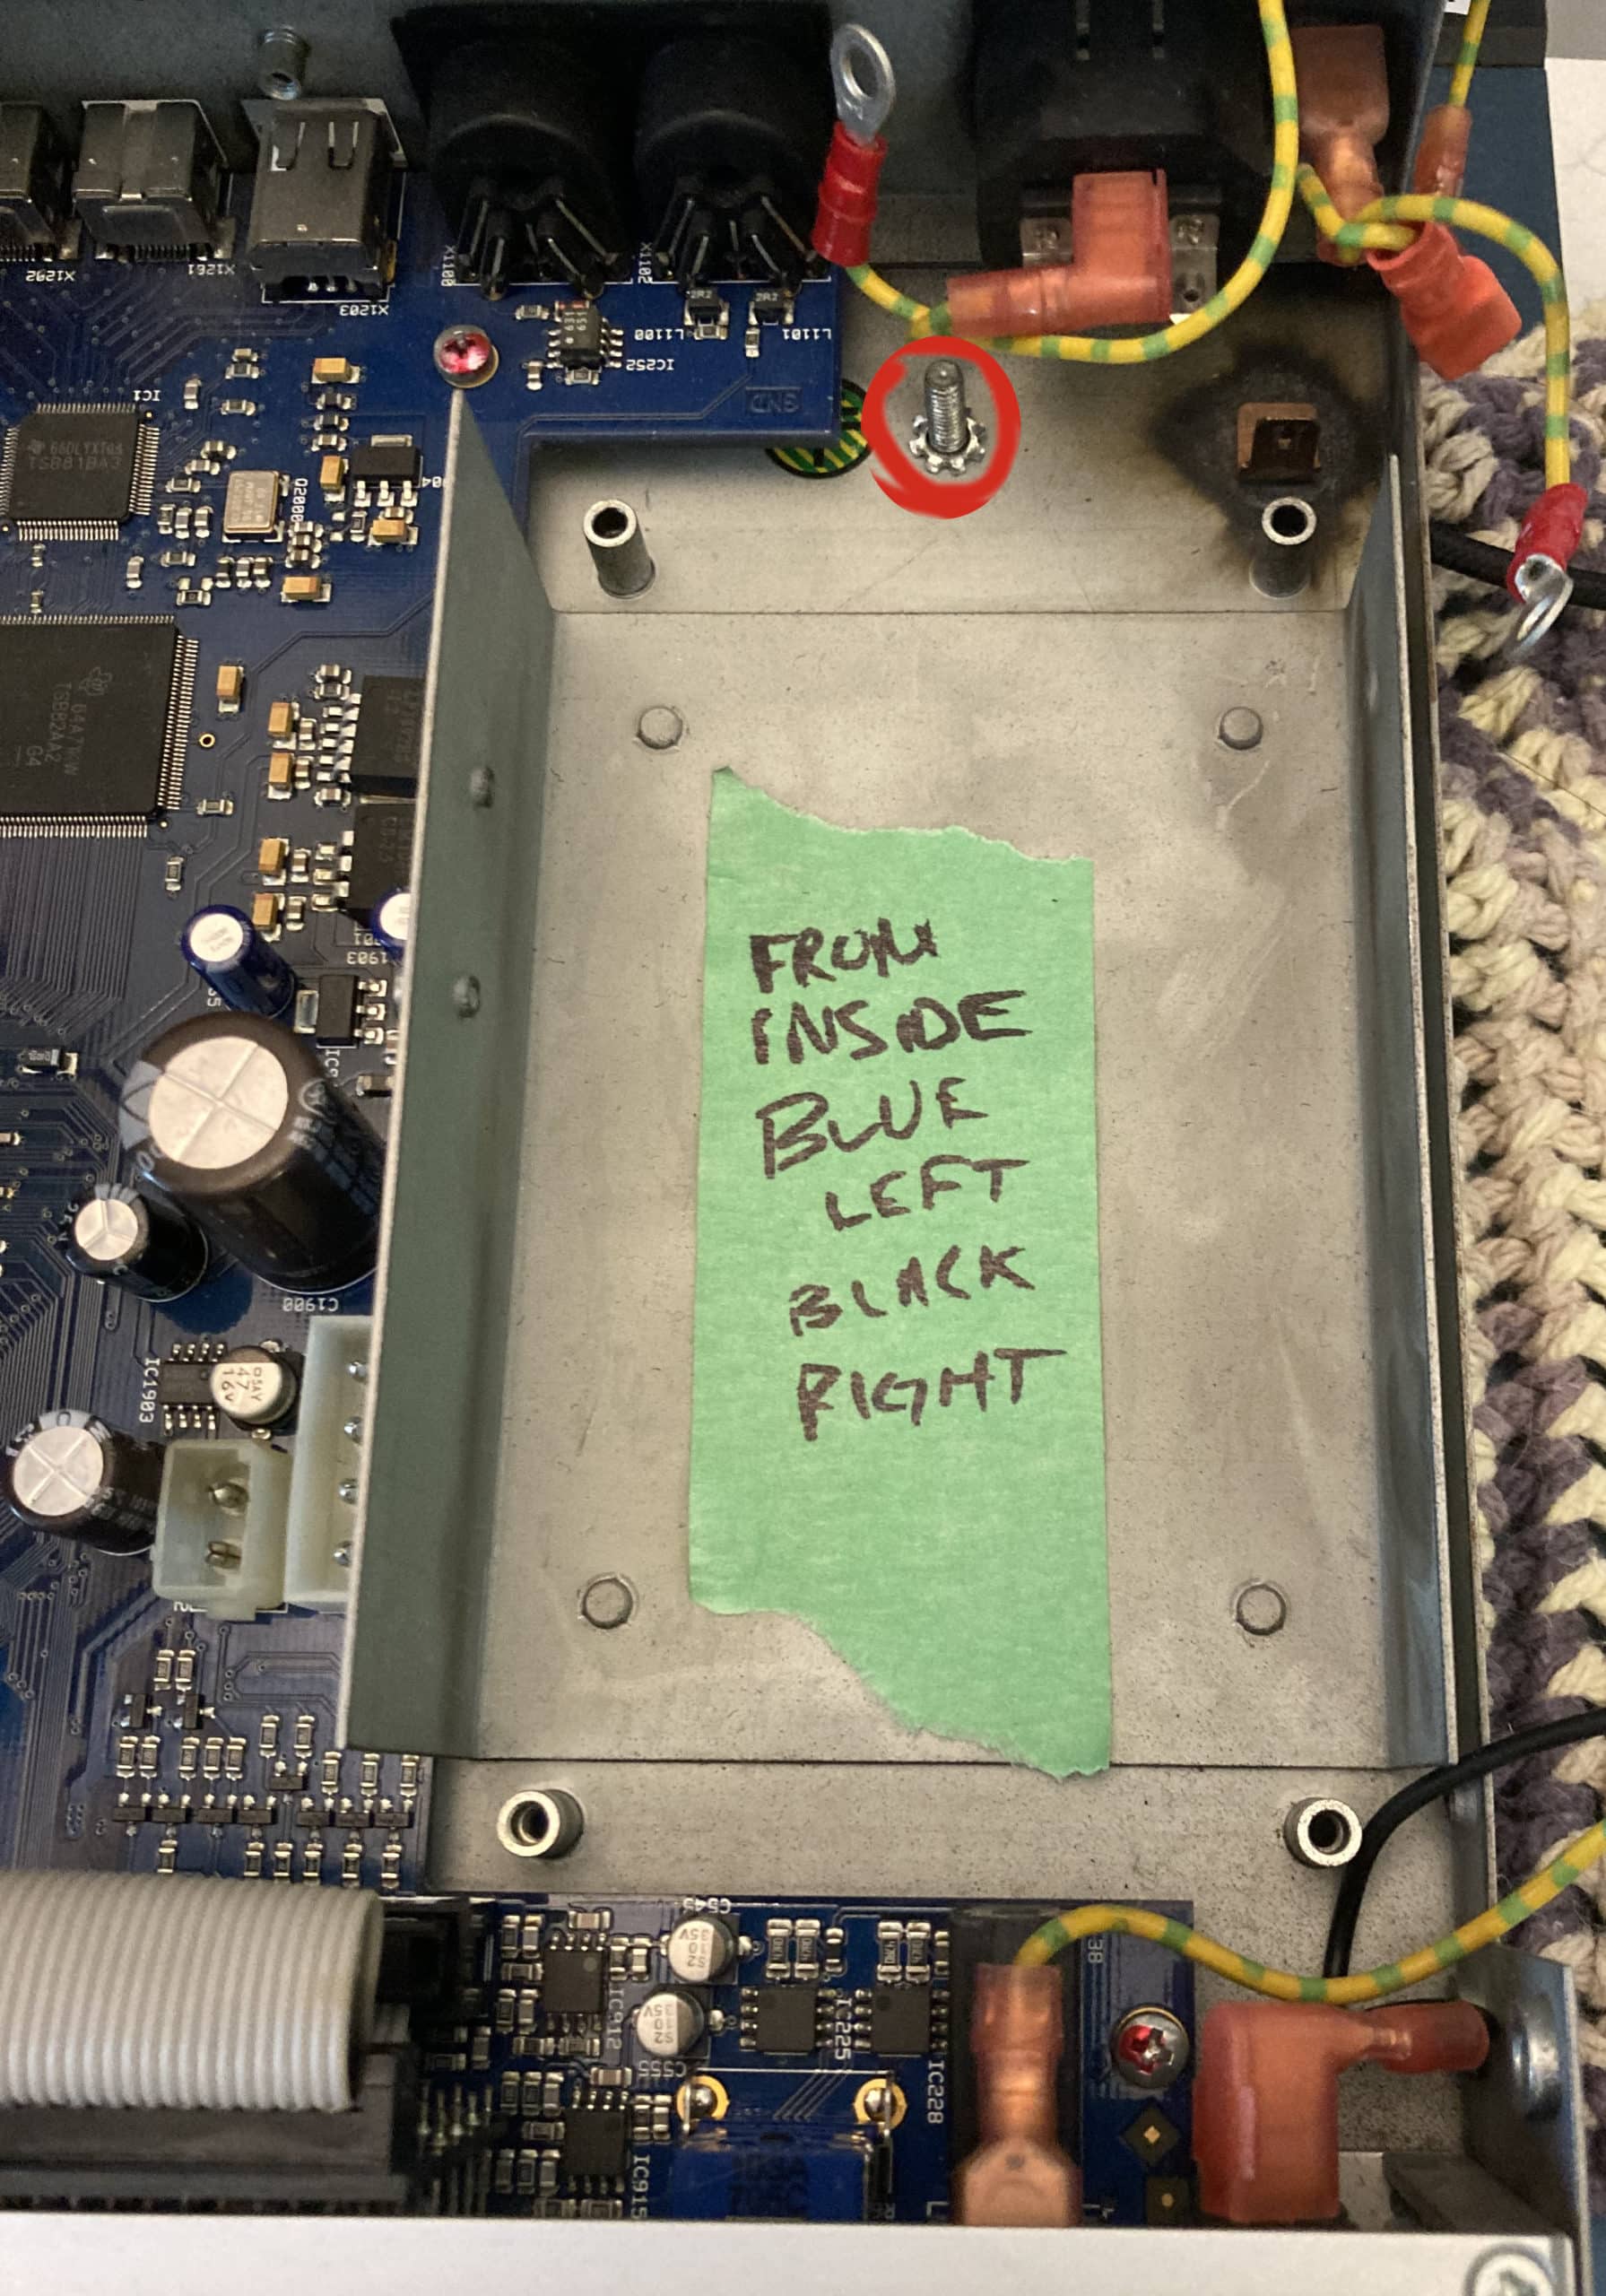
as well as the terminal on the right. It looks burned but it’s just from welding.
Then wire in your new cable assembly if you have an older model. Route the black cable (along with the others) along the housing of the Fireface where it was run before. I used the old tape from the cable that was routed to the power switch to help the new cables fit snuggly, even though it was cut. Connect the terminal to the terminal post, I think mine was originally at the bottom of the stack. Wrench it back on snuggly.
Connect the molex connectors firmly. Heat the heat-shrink tubing and replace the cover. Replace the four screws that hold the PSU in place.
Giggle with excitement.
Double check everything. Then replace the cover and plug in the power to test if the unit turns on.
Please leave any questions if you have any. Don’t be afraid to ask something before you start. This guide should work for the Fireface UFX, 400 and 802 but the internals will be slightly different. Eventually I will get my hands on a newer one.