Your Ultimate RME Fireface 800 Repair Guide: Rezzing a Dead Unit
As an RME hardware enthusiast since my days in a Toronto-based Nuendo audio studio, I’ve always admired the rugged and multifaceted design of their interfaces. Among their line of products, one that particularly stands out is the RME Fireface 800 – a veritable Swiss Army knife of audio interconnection. While the company has released more advanced interfaces since, the Fireface 800 remains a viable and useful piece of equipment. So, what do you do when you stumble upon a dead Fireface 800? This RME Fireface 800 repair guide will walk you through the steps to breathe new life into it using a new power supply from RME-shop, a reliable parts supplier for RME. It’s also important to be cautious when working with the PSU due to the risk of electric shock. If you’re uncertain about any steps in the process, it’s highly recommended to seek professional assistance.
Your Ultimate RME Fireface 800 Repair Guide: Rezzing a Dead Unit is a concise, step-by-step manual to help you identify and repair power supply issues. I also have a maintenance guide for the Maschine MK2 if you need to clean up some dirty pots or have dull pads.
Common Issues with Dead Fireface 800 Power Supply Units
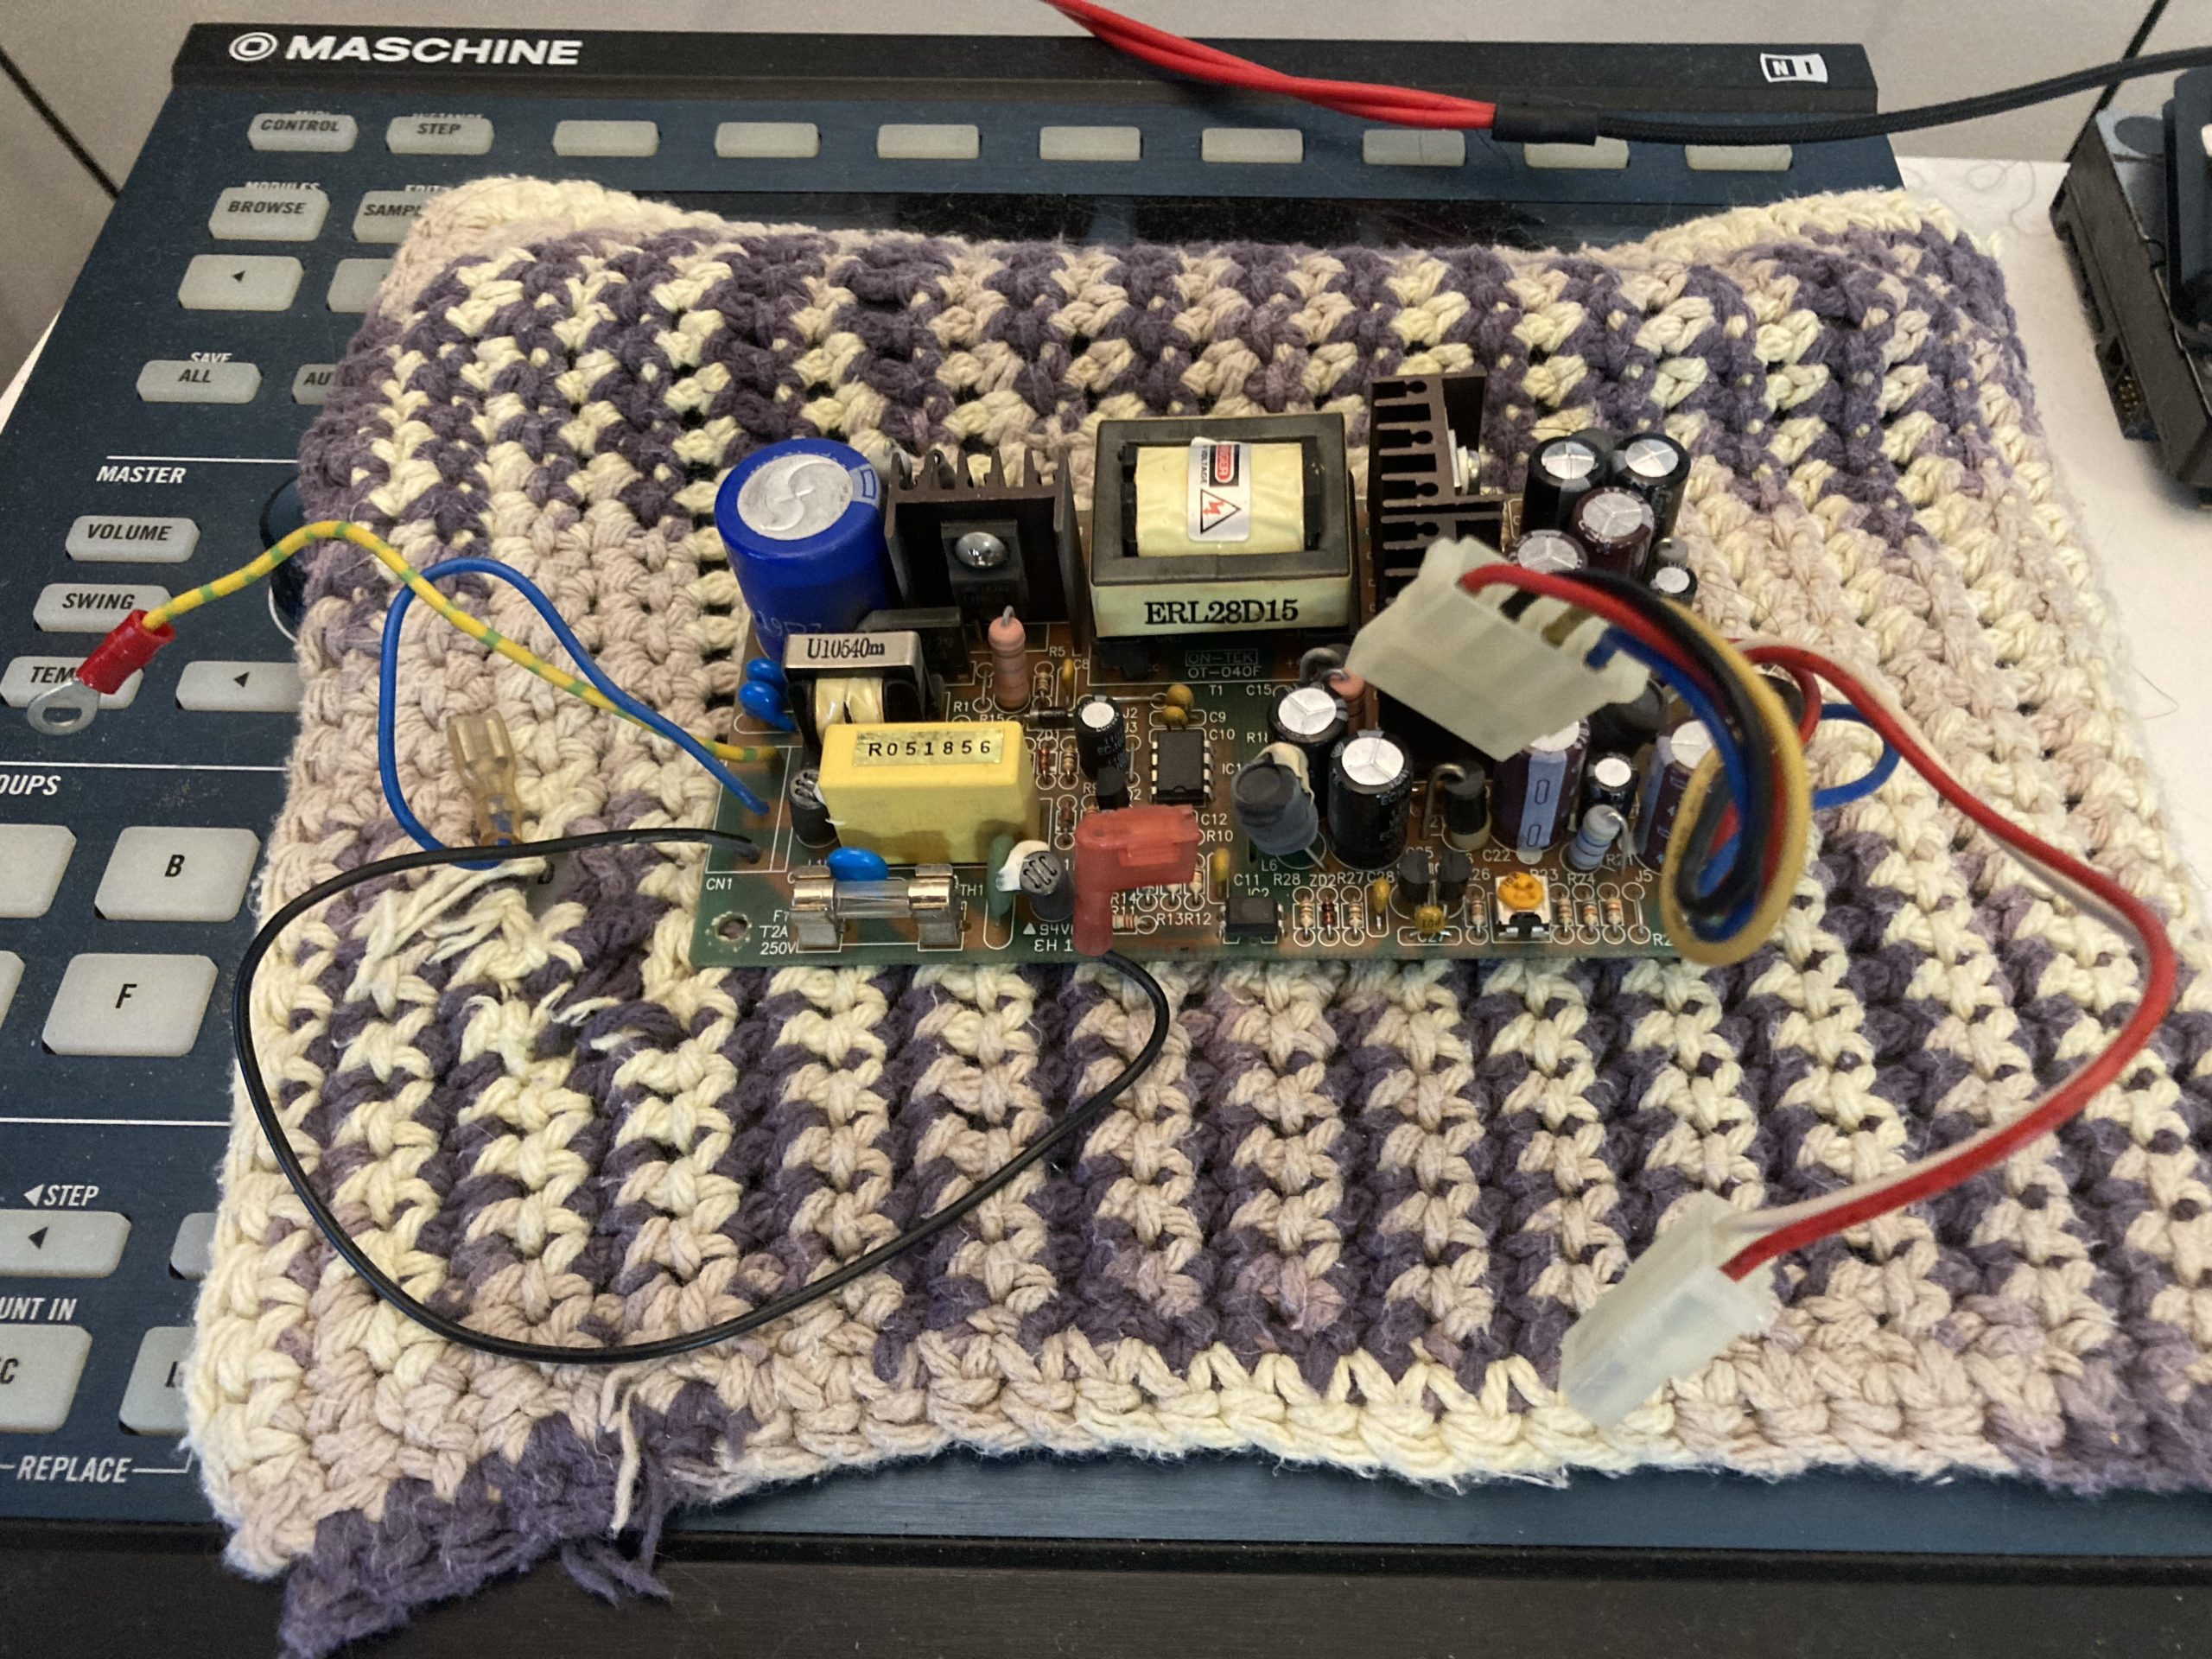
Before we jump into the repair process, it’s essential to understand what you’re dealing with. Bulging capacitors, particularly C16 and C17, are a common sight in dead Fireface 800 power supply units (PSUs). Despite this, your PSU might still function, excluding those bulging components. In my case a few caps are visibly bulging.
Recapping a PSU is a straightforward process that could potentially save you both time and money if you can find the necessary components. However, in this RME Fireface 800 repair guide, we’ll focus on swapping the PSU out for a new one. As always, exercise extreme caution while handling a PSU – the capacitors can retain a charge that could prove fatal. Remember to always disconnect the power supply from the mains before you start testing, and only reconnect it when you’re ready to take a measurement. Never touch the probes or any exposed metal while the PSU is connected to the mains, and always exercise caution when working with electrical equipment.
Preparations Before Starting
Before you begin, ensure that you have a small Phillips head screwdriver, a spudger (or a pen to manipulate components), and a 7mm wrench for the grounding nut. Next, unplug the unit and leave it turned on for a while. As mentioned earlier, capacitors can hold a charge for extended periods, so it’s safer to avoid direct contact with them or discharge them safely.


Removing the Old Power Supply
Start by removing the seven small black screws on the body and the rack ears of your Fireface 800 rev1 to open it. Slide the cover off towards the back, keeping in mind that a ground connector is attached to the top. Wiggle the cover gently back and forth until it detaches.
Next, remove the four screws securing the old power supply in place. If your model resembles mine, you might want to pull it out to create more working room. Just remember to unplug all connectors first.
Installing the New Power Supply
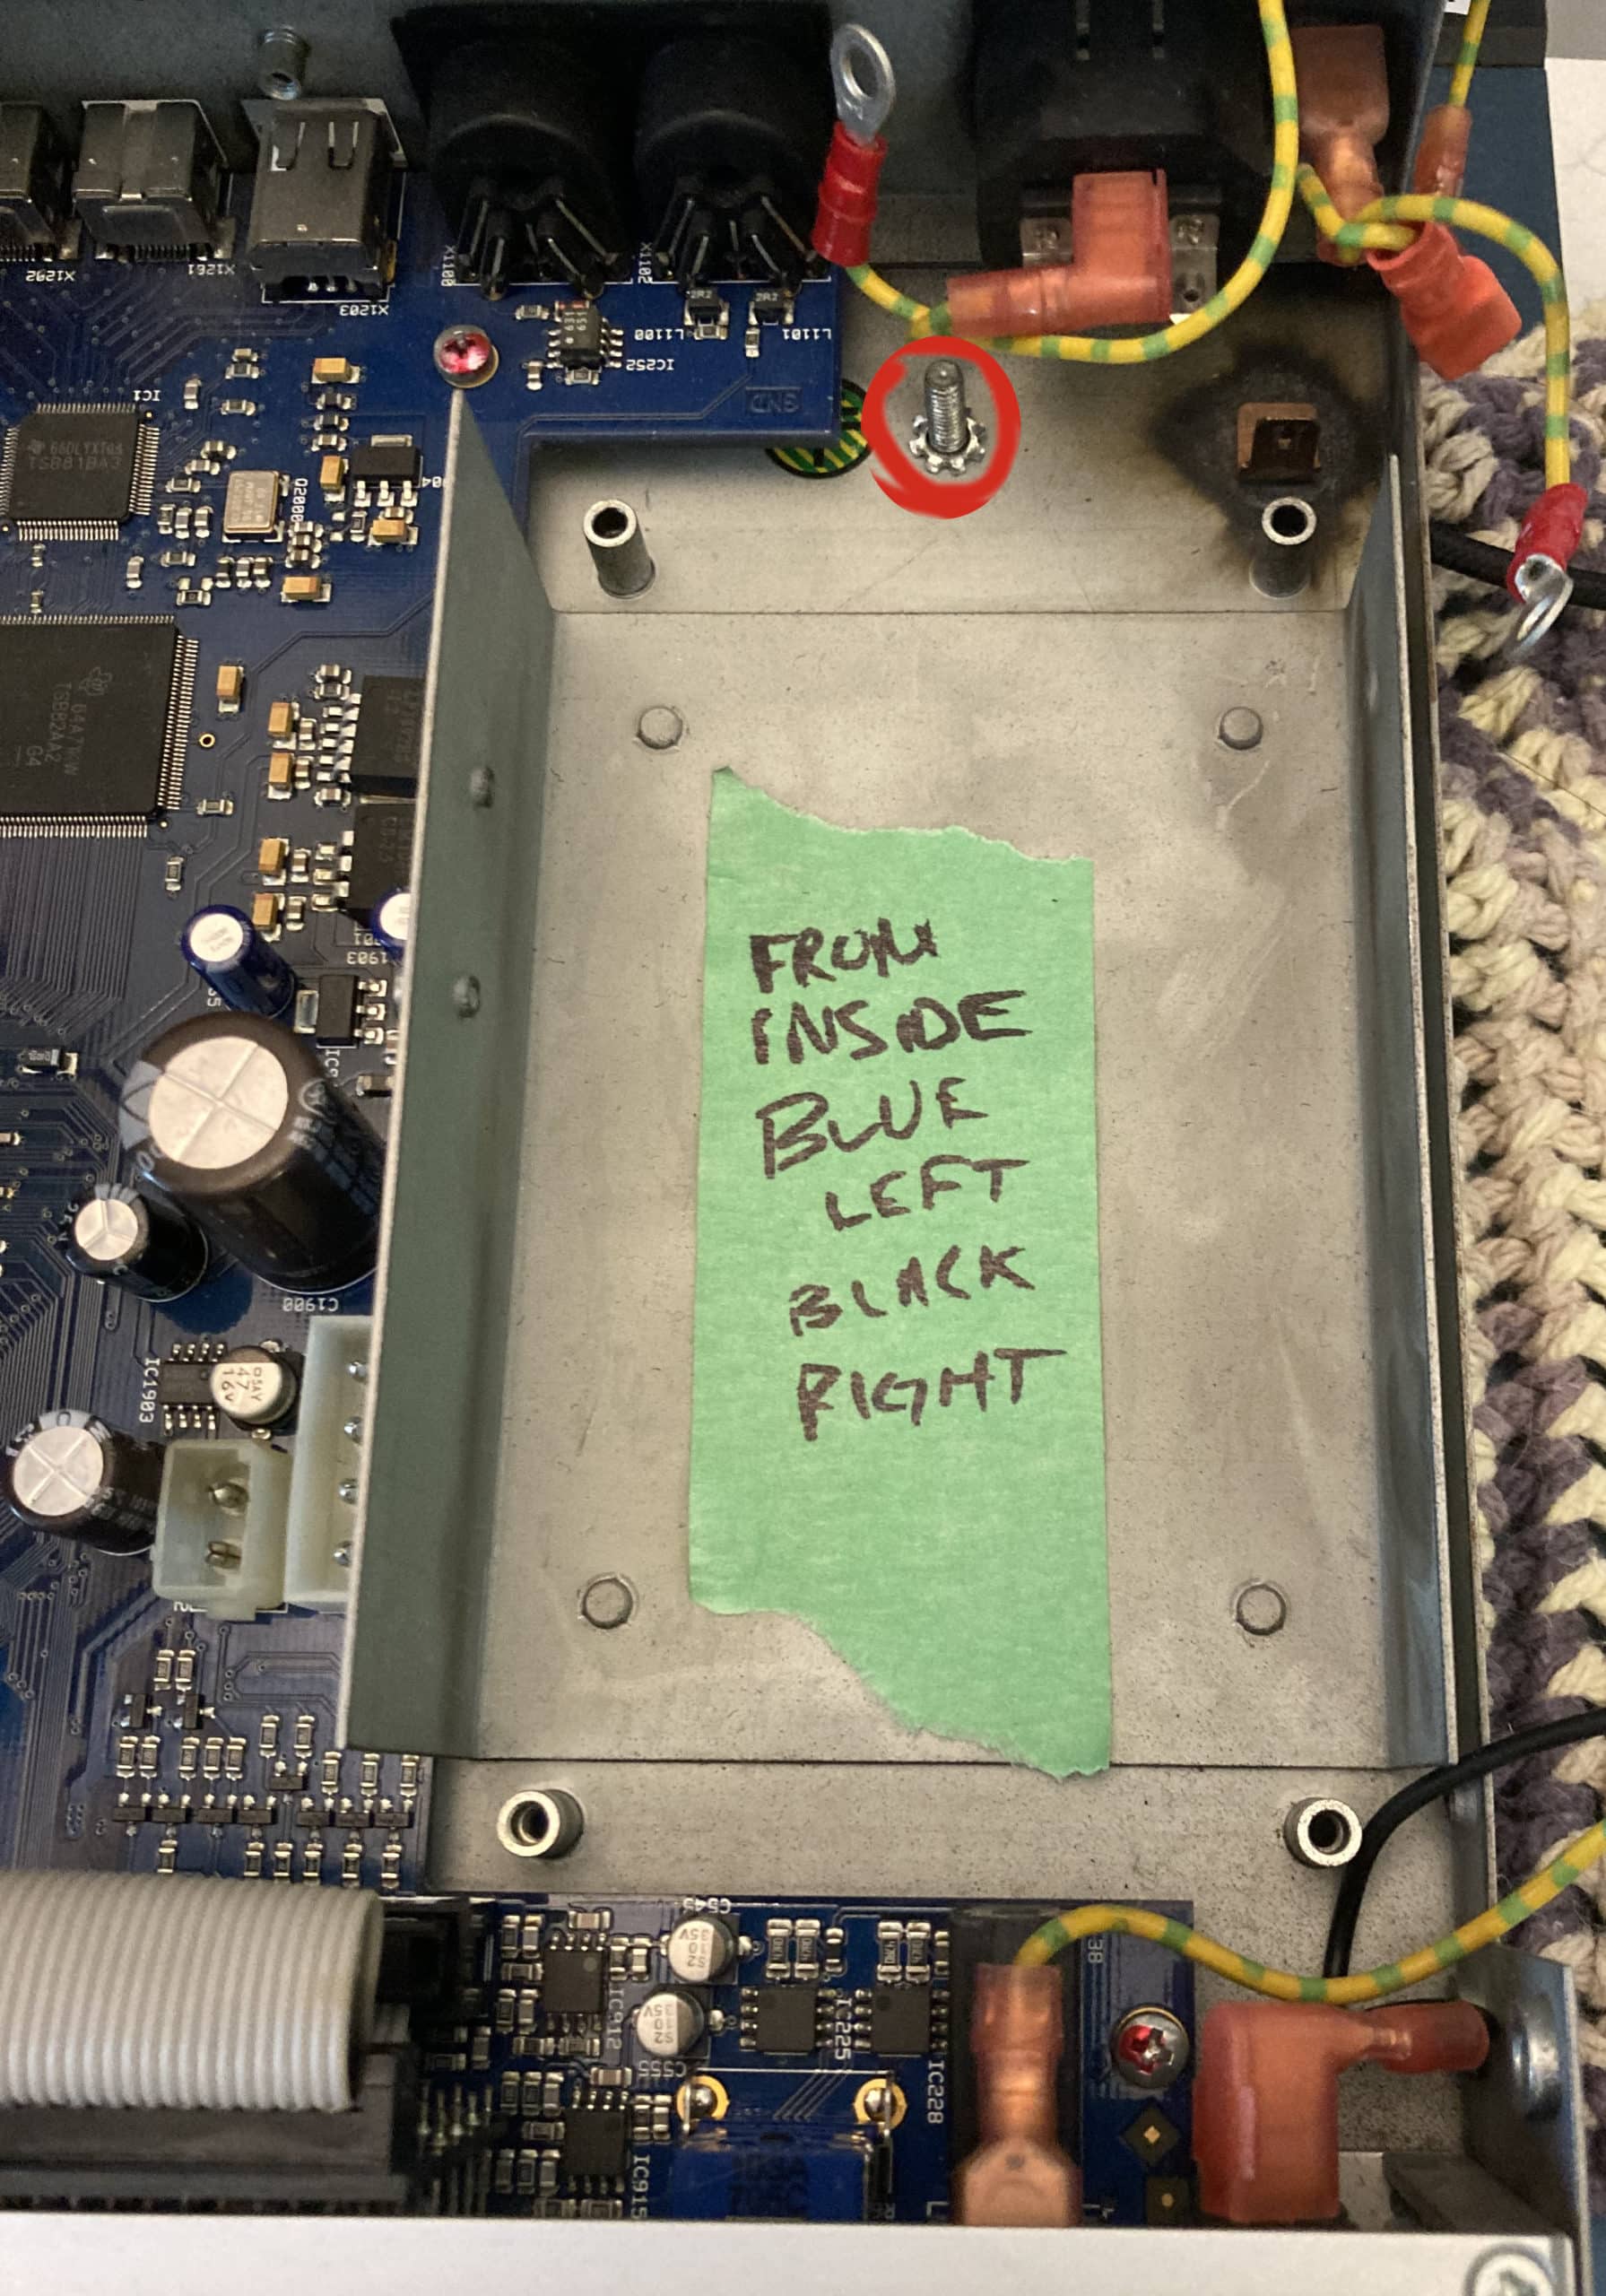
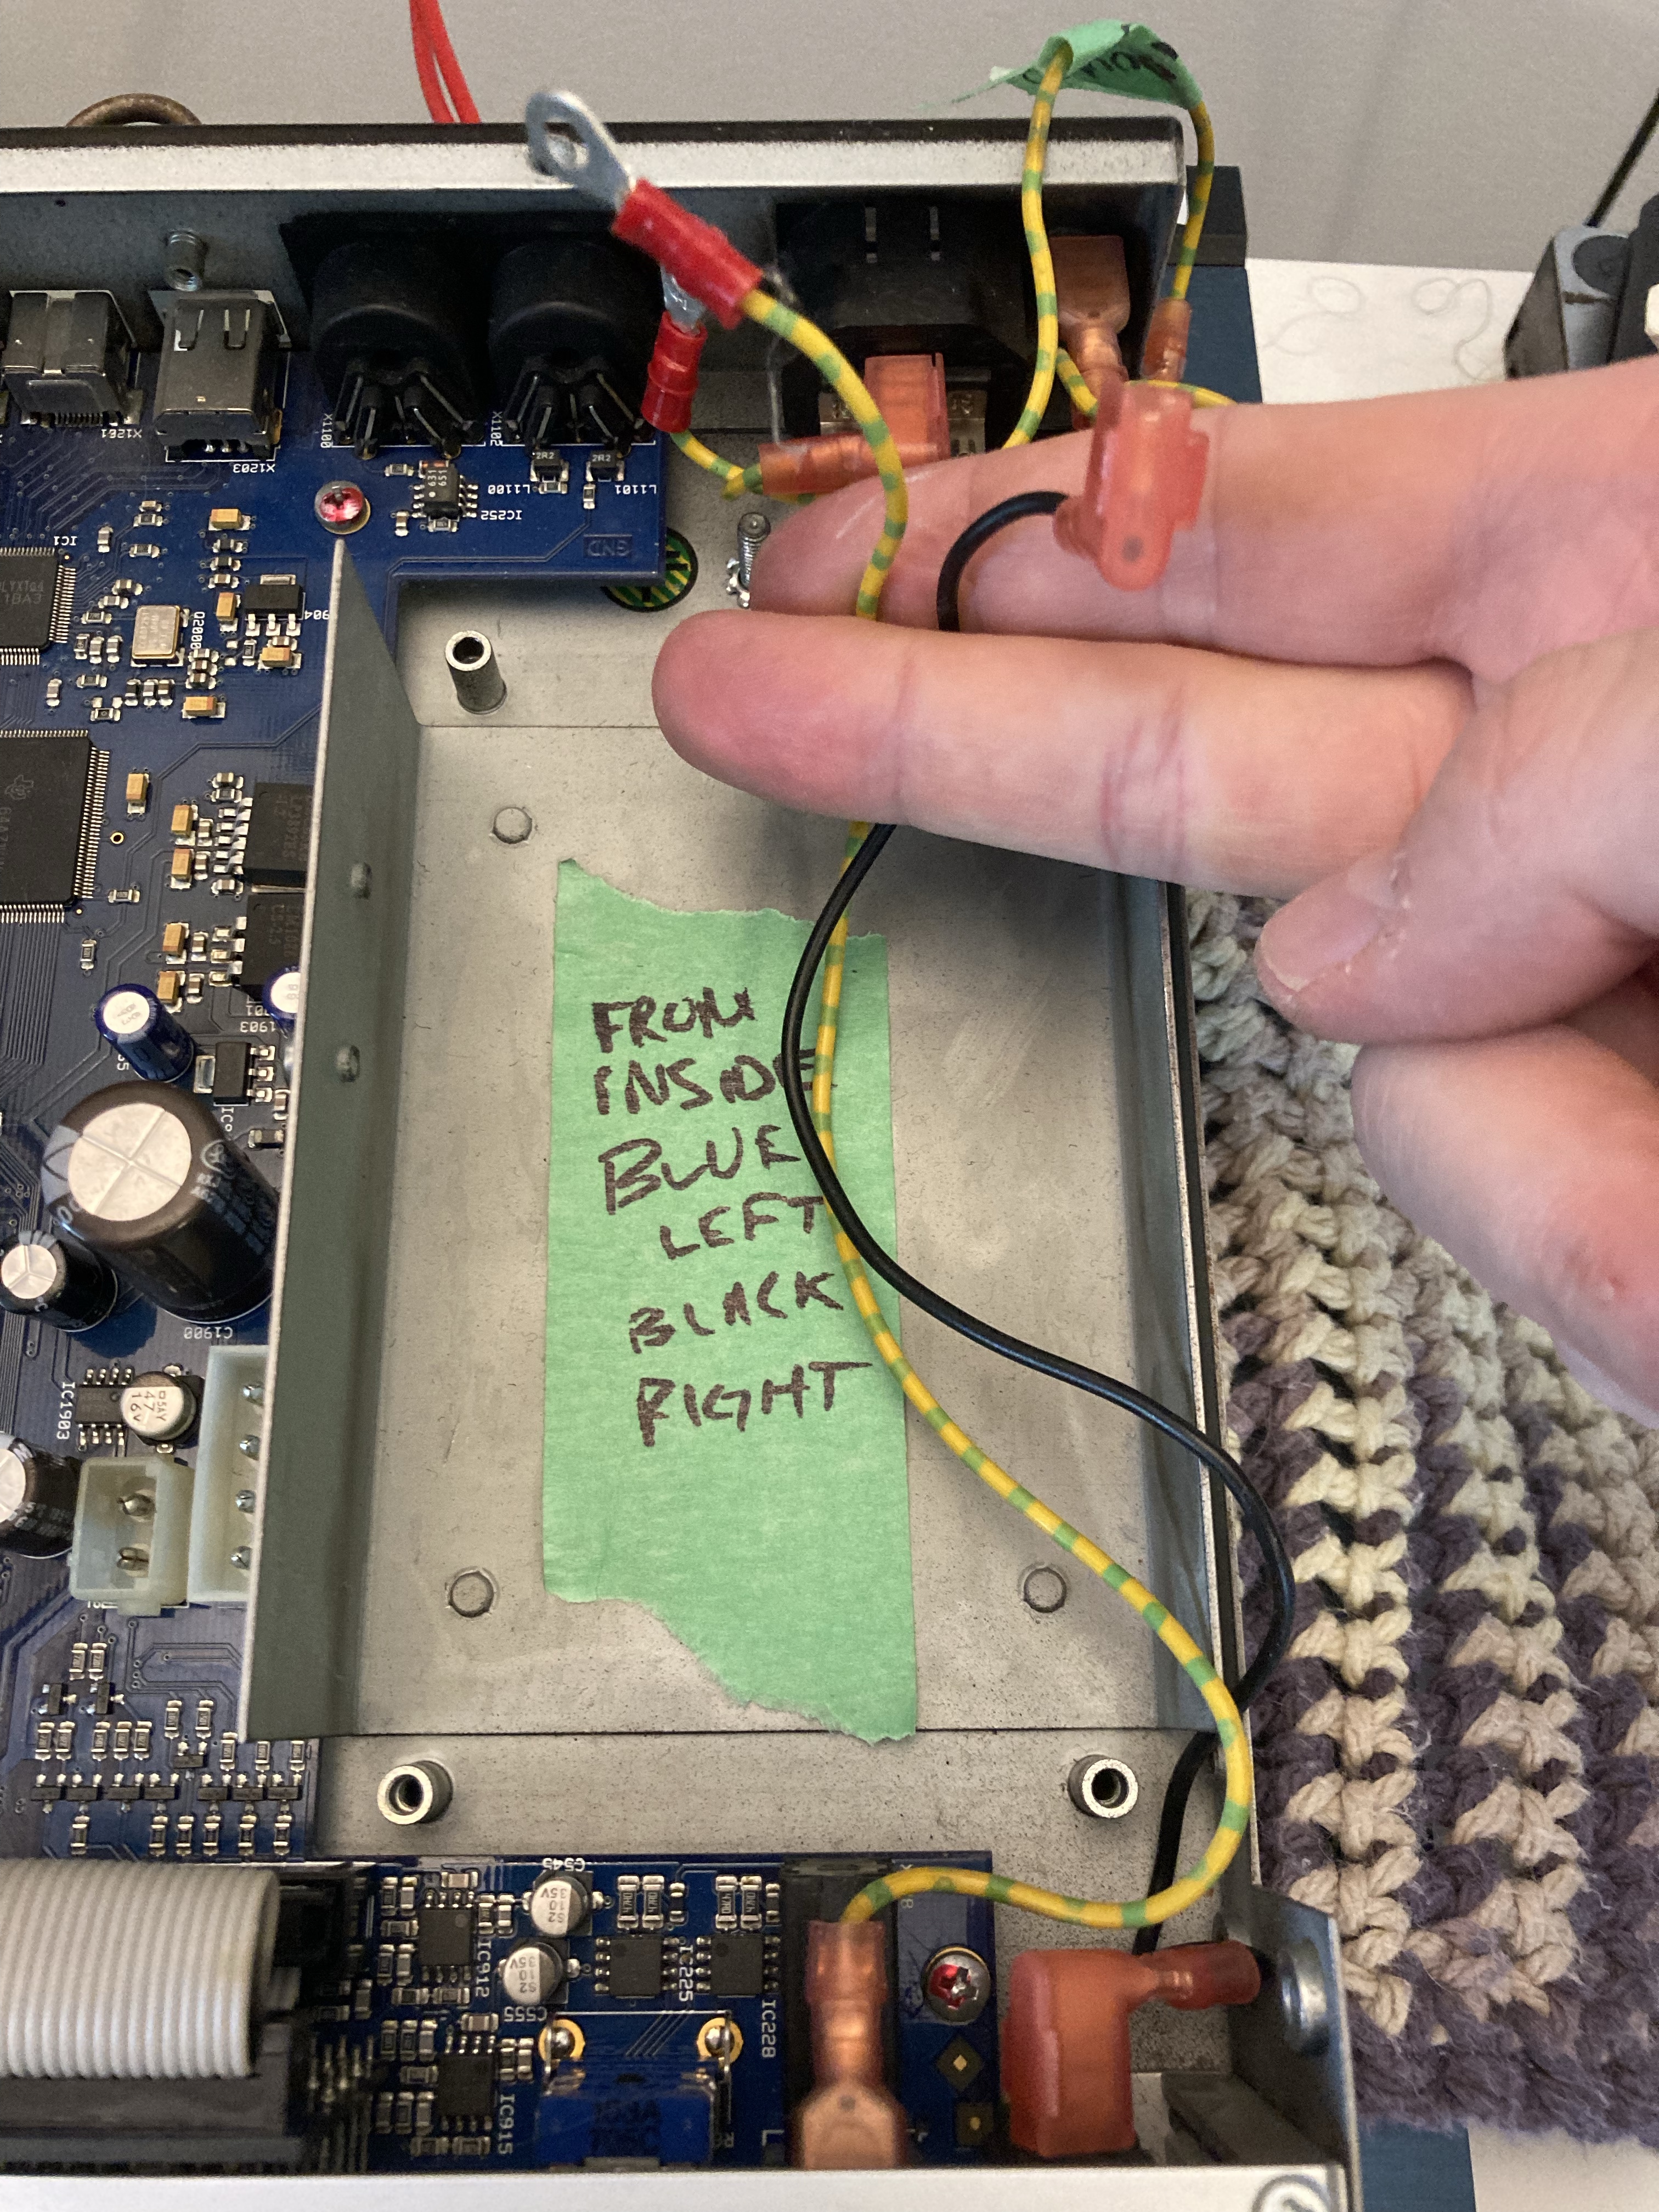
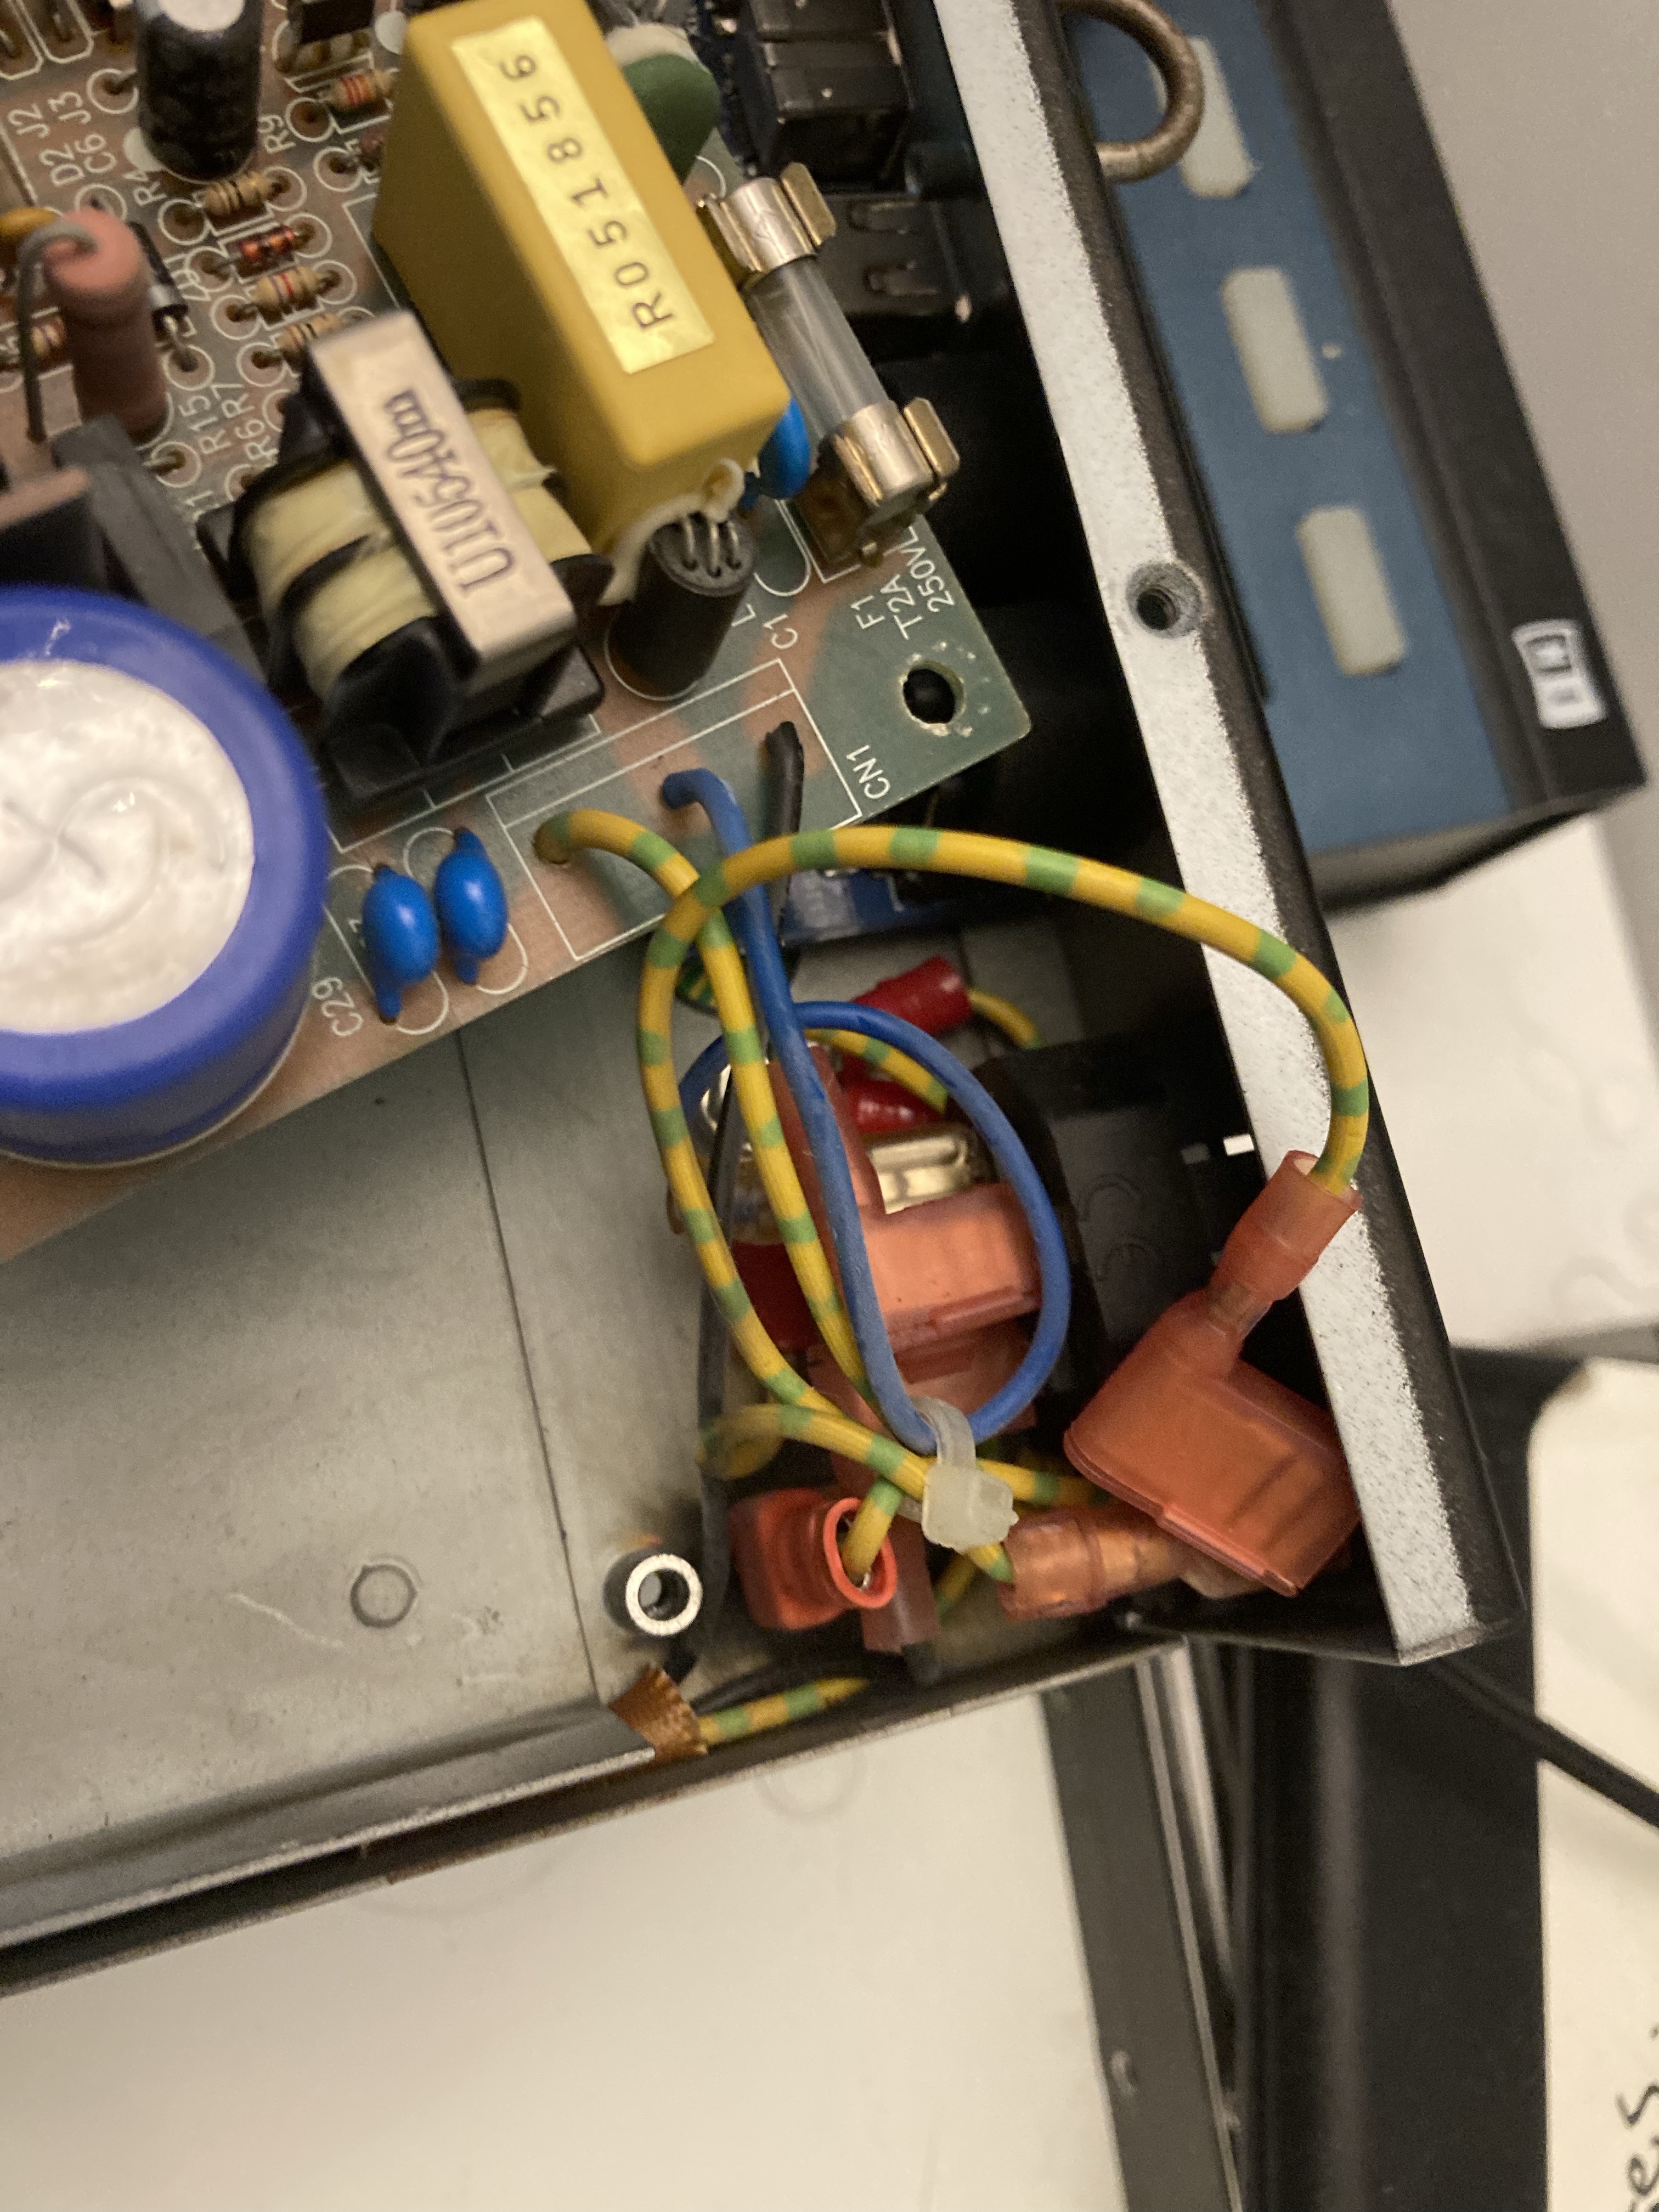
Now comes the critical part of our RME Fireface 800 repair guide – installing the new power supply. Begin by disconnecting the first cable from a ground that requires a wrench for removal. The second cable connects directly to the AC terminal, while the third leads back to the power switch.
Remember to keep track of your steps and take notes if necessary, especially if you’re not completing the repair in one sitting. After disconnecting everything, ground things back to the terminal and wire in your new cable assembly if your model is an older one.
One connector that might prove particularly stubborn is the two-pin molex. To remove this, splash the connector with 99% alcohol before working it free – it works like a charm!
Final Steps to Your Ultimate RME Fireface 800 Repair Guide: Rezzing a Dead Unit
Finally, route the cables out of the way, connect the molex connectors firmly, and heat the heat-shrink tubing. Replace the cover, secure the PSU with the four screws, and voila! You’ve successfully followed this RME Fireface 800 repair guide and revived your Fireface Sure, here’s a revised version of the article incorporating the Yoast SEO guide, along with the focus keyphrase “RME Fireface 800 repair guide”:
Repairing the RME Fireface 800’s power supply unit (PSU) can be a complex task, especially without the official schematics. However, a common first step is a thorough visual inspection.
- Initial Inspection: Start by looking for any obvious signs of damage. This could be a burnt-out part, a short of transistors/diodes/diode bridge, or any other visible anomalies. Pay special attention to any unusual sounds when the unit is powered on. For instance, a missing “click” sound can indicate an issue. The “click” is usually heard a second after turning on the unit and might come from a transformer.
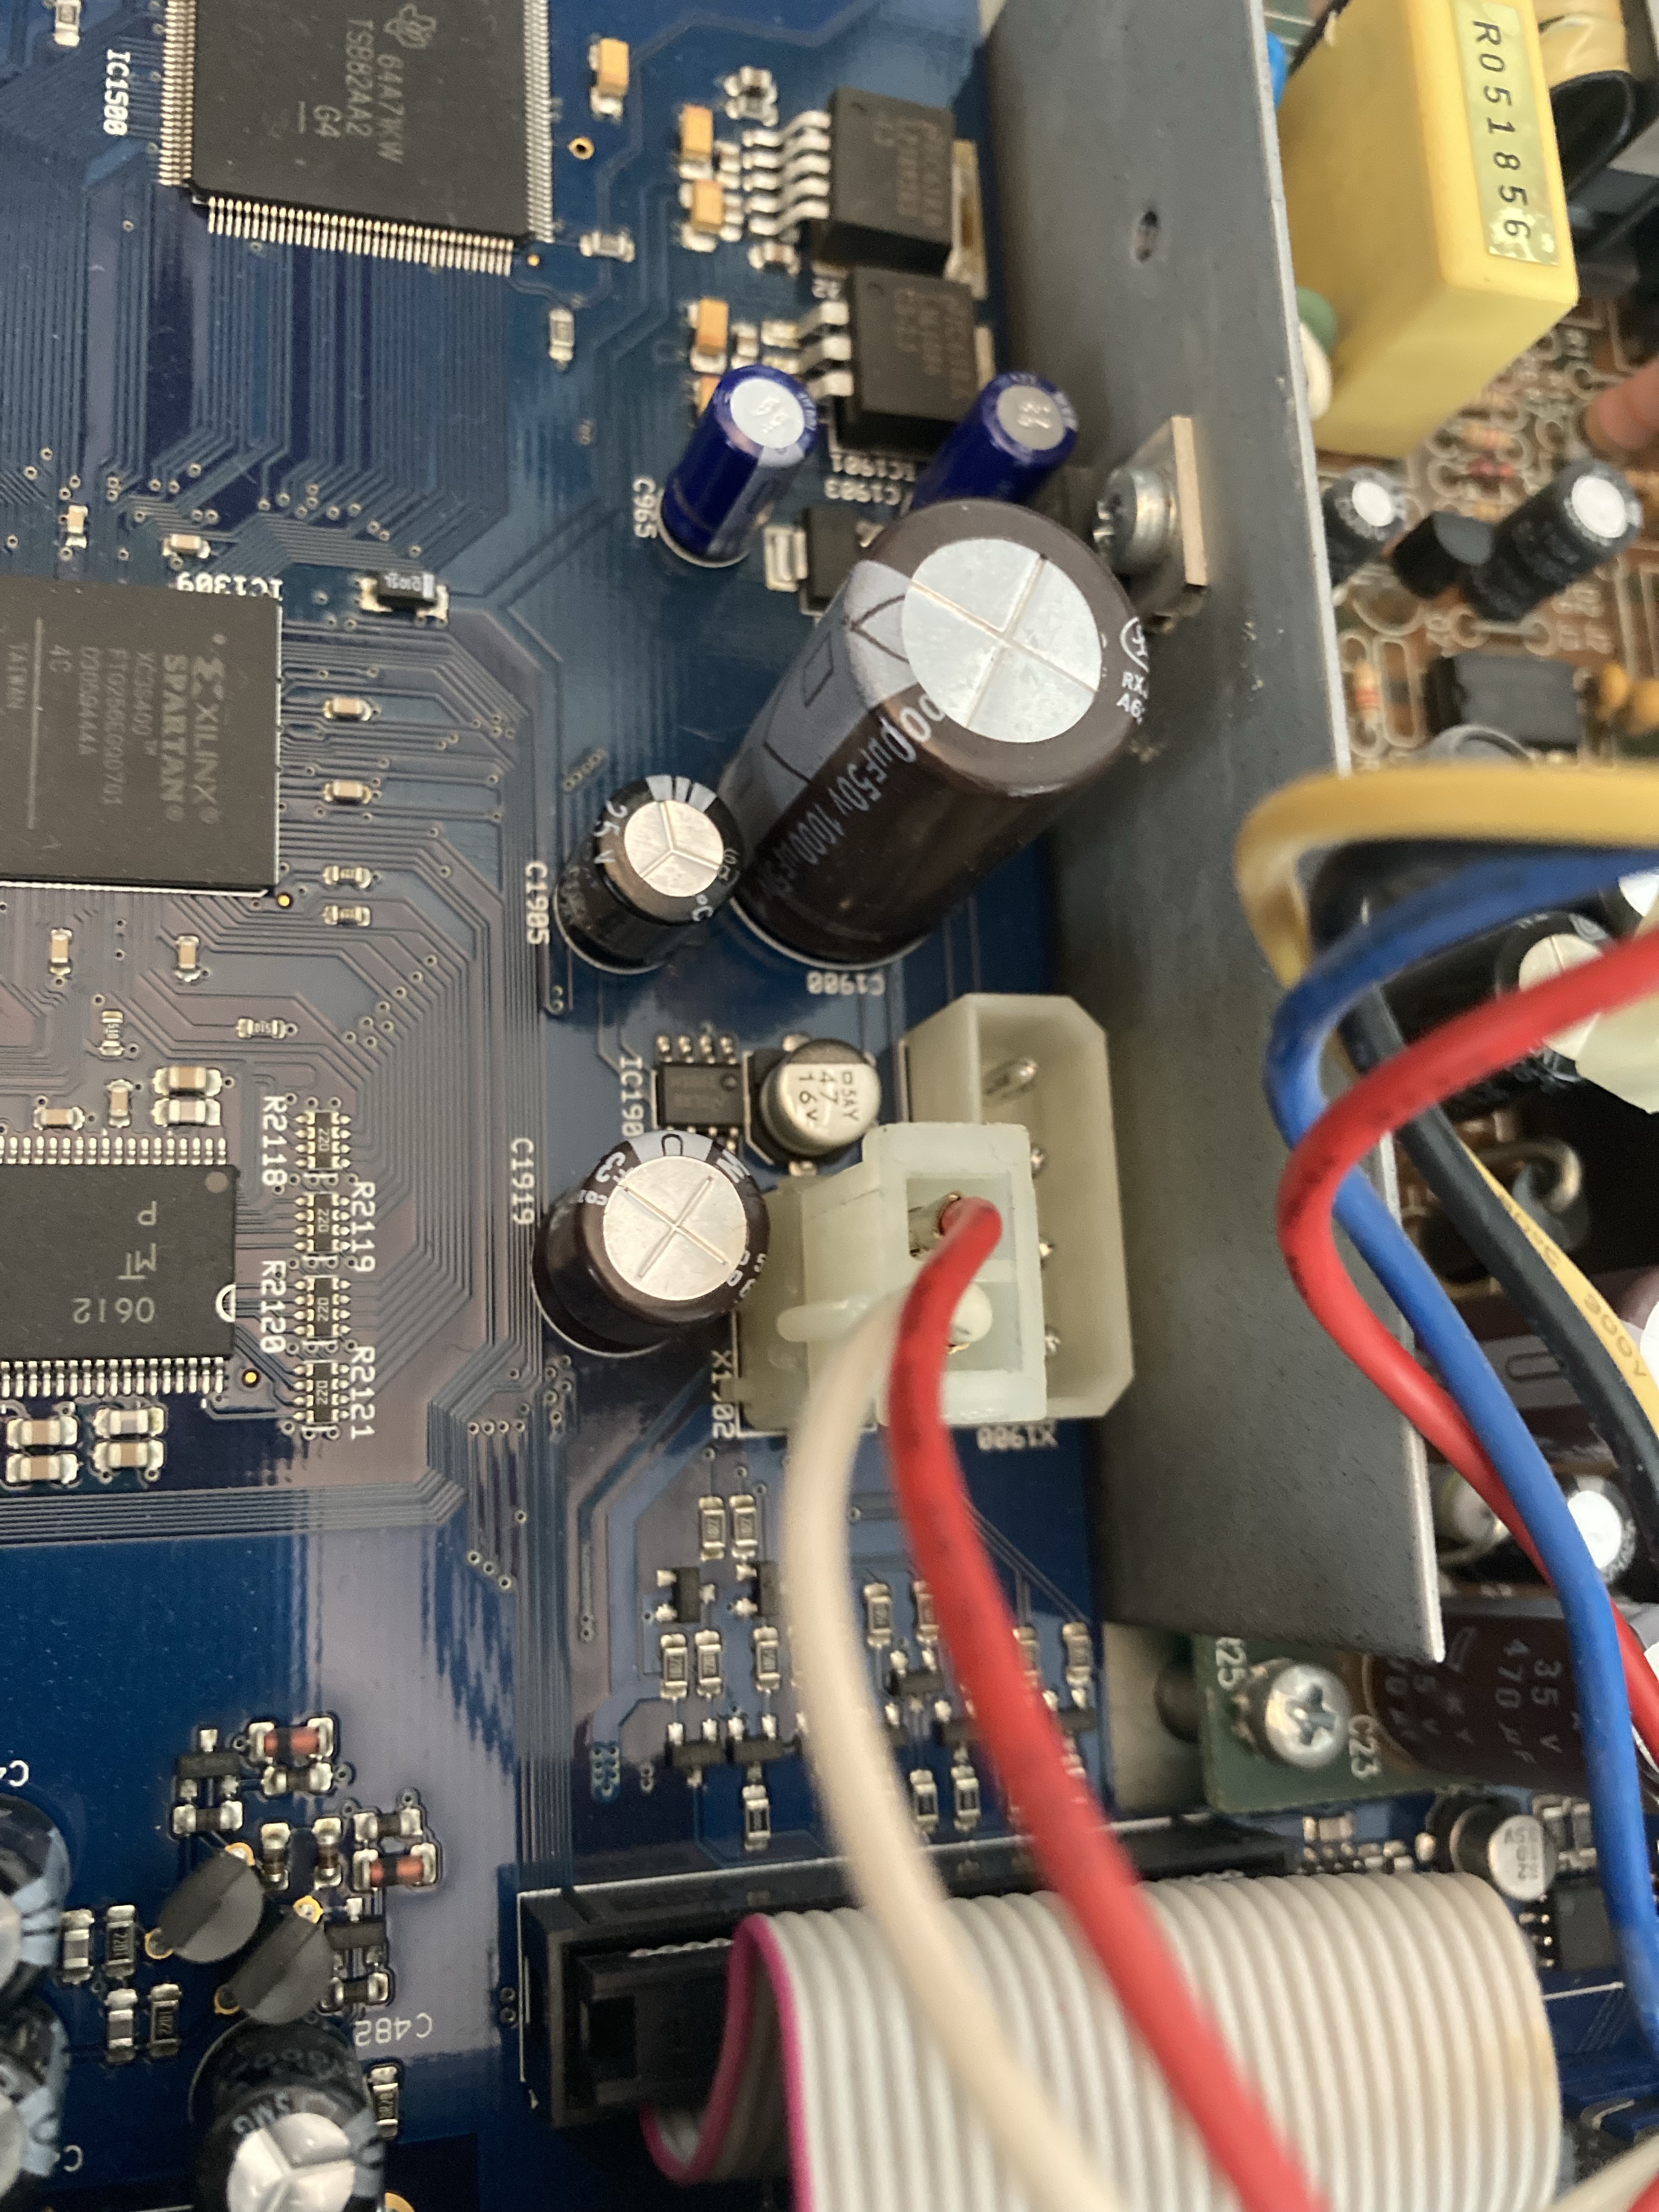
- Check the Capacitors: Pay close attention to the electrolytic capacitors in the output section. These can often be identified by a bulging top, indicating failure. However, even if there’s no visible bulging, any of these capacitors can still be faulty.
Please note that these steps provide a general approach and may not cover all potential issues with the PSU of the RME Fireface 800. Below is a quote from Gearspace that includes a link to a BOM for all capacitors necessary.
Thanks to you awesome people in this thread I was able to revive my Fireface 800 after it died recently. Unit was totally non-responsive, found this thread, ordered some capacitors, did some ramshackle soldering and bam I’m back in business!
Many thanks to all you guys who shared your info and tips!
I used the exact capacitors from Arturo00’s list: https://gearspace.com/board/attachme…om-digikey.xls
With the new caps and the diagram from Temptin’s post I was able repair the unit for less than $20.
-Krushage Gearspace
Leave a Reply